I had cause to remove my rear bumper on the F430 (again) and managed to take a few pictures of the process. The job can easily be achieved by one person but it helps to have an extra pair of hands available to help lift the bumper on and off the car.
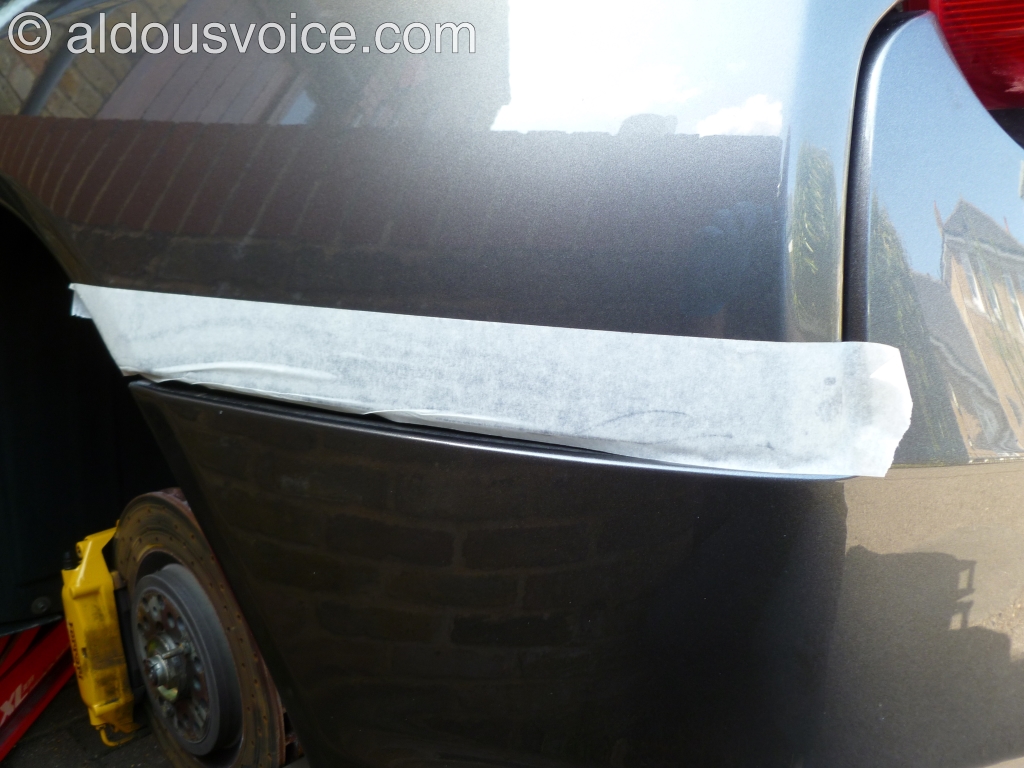
First of all, it is wise to put a little tape on the rear wings in order to protect them from scratches.
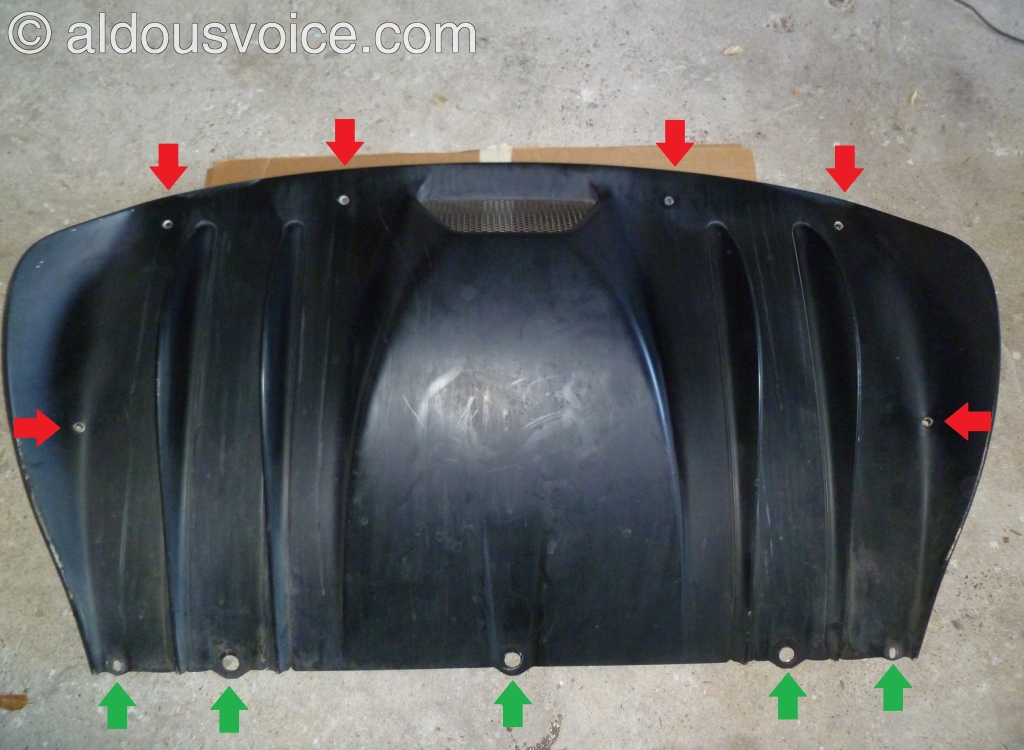
Next up, the diffuser needs to be removed. This is held in place with five M6 bolts (green arrows) and six M6 countersunk screws (red arrows):
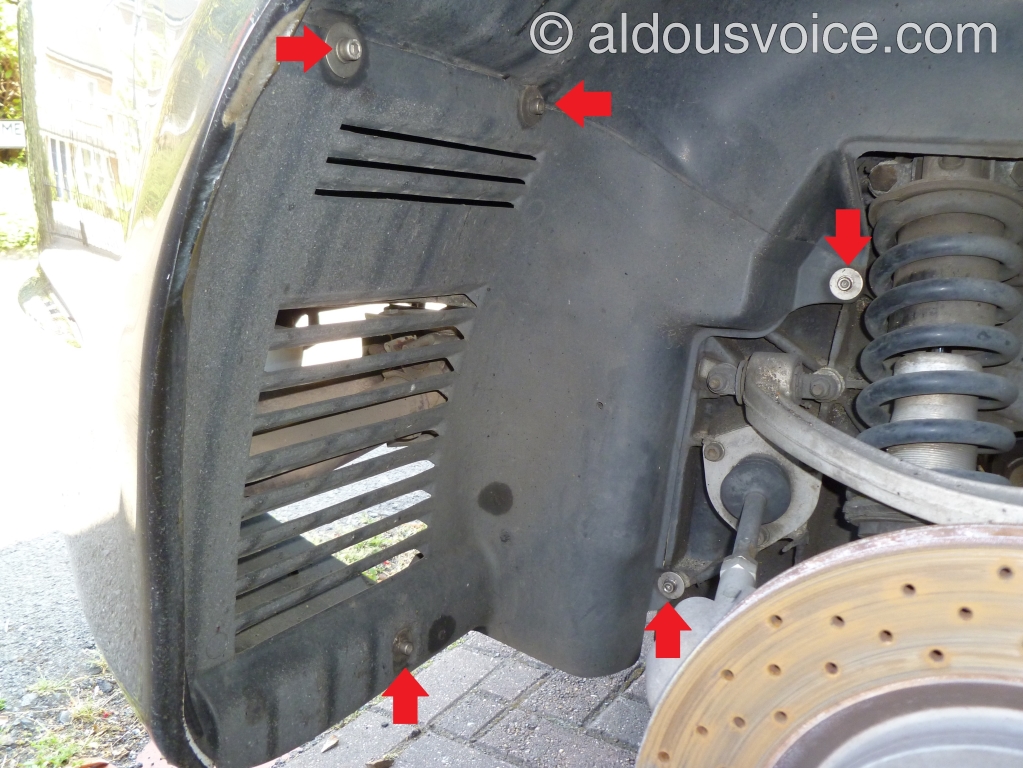
Both rear wheels need to be removed to provide access. Undo the five M6 bolts holding the gravel guards in place – in this picture they are socket head cap bolts but the car was originally fitted with pozidrive screws at the factory. Remove the guards taking care with the rubber seals. Also, take care with the RHS guard as it has an overflow pipe for the F1 fluid attached to the back of it.
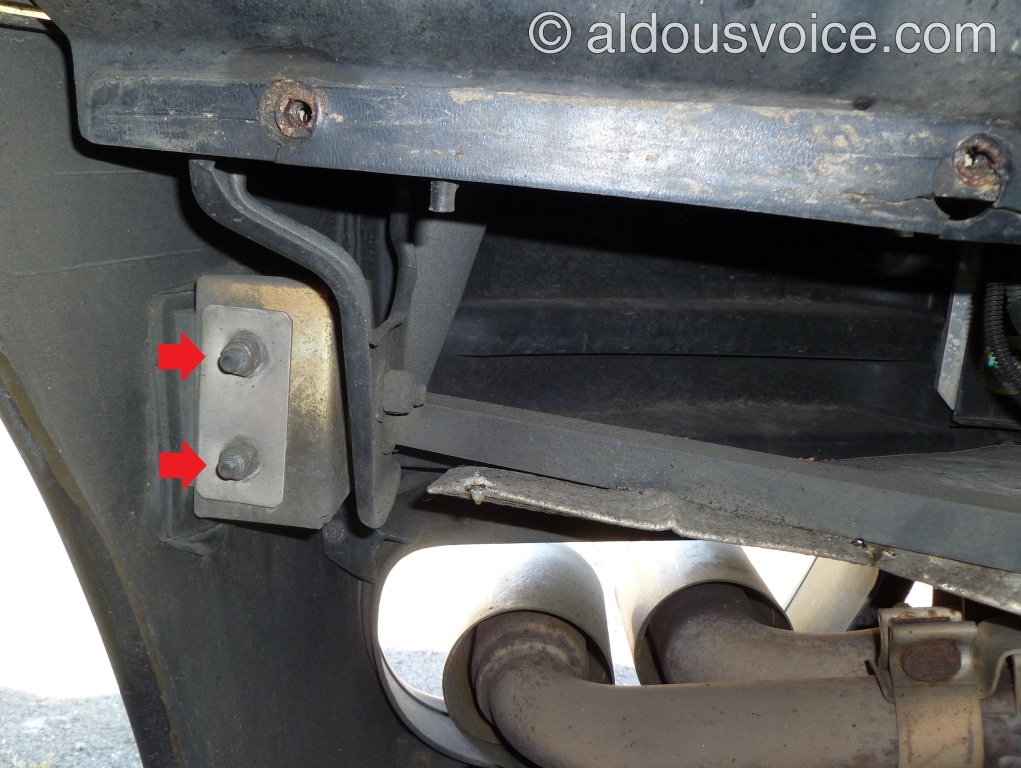
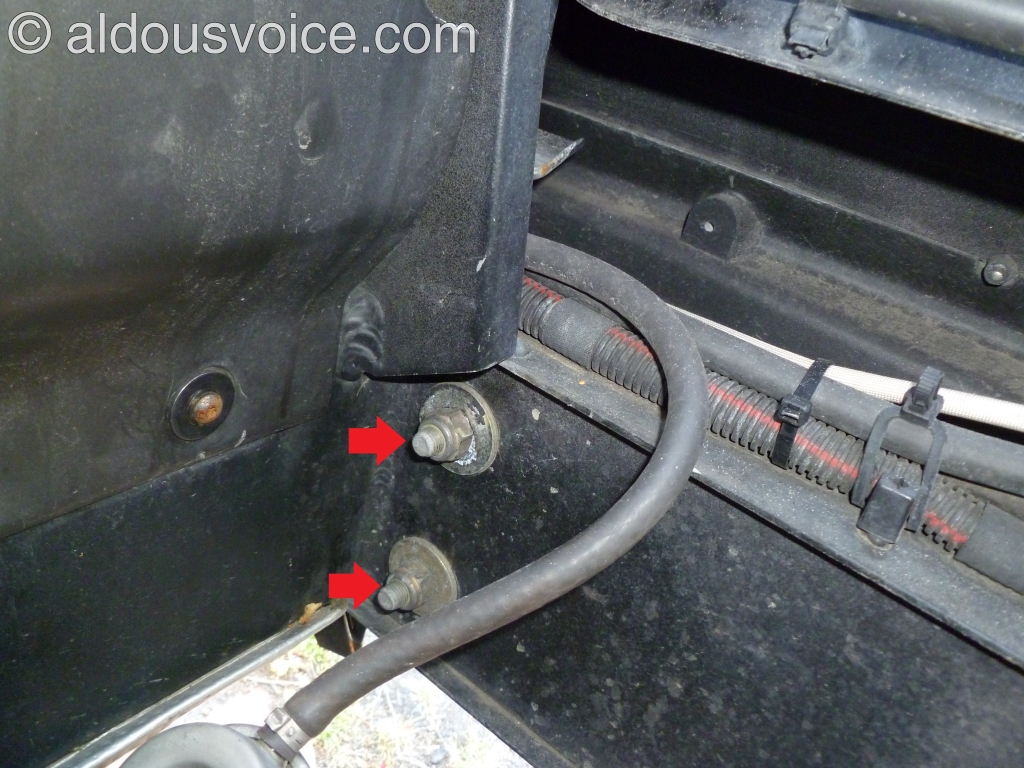
Undo the two (per side) M8 nuts holding the edges of the bumper to the chassis. Make sure to retain the rectangular plate.
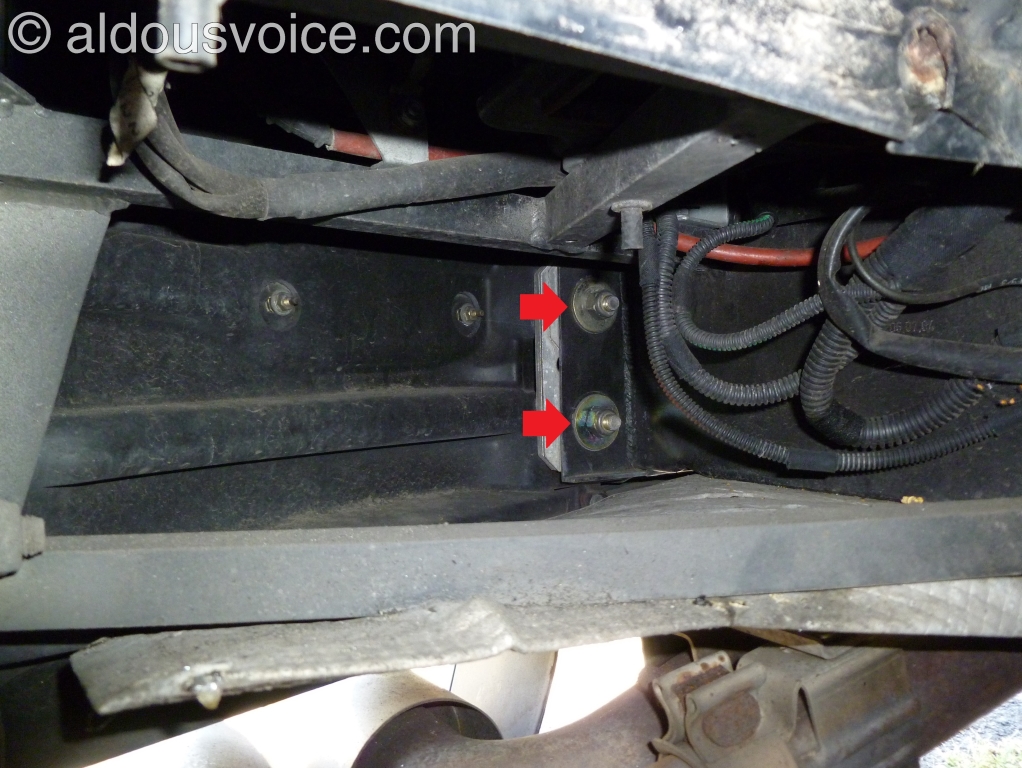
Still working from inside the wheel well, undo the M10 nuts holding the main bumper bracket to the chassis (two per side). Retain the washers.
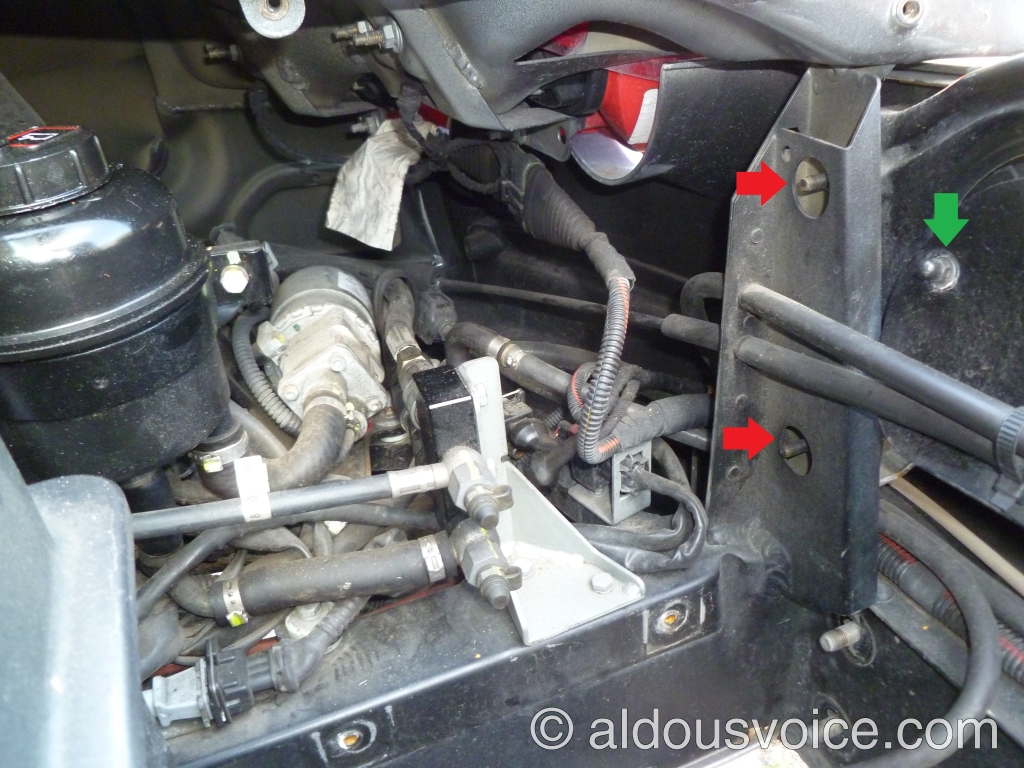
Working from the top of the car, undo the two (per side) M10 nuts holding the main bracket to the chassis. Retain the washers.
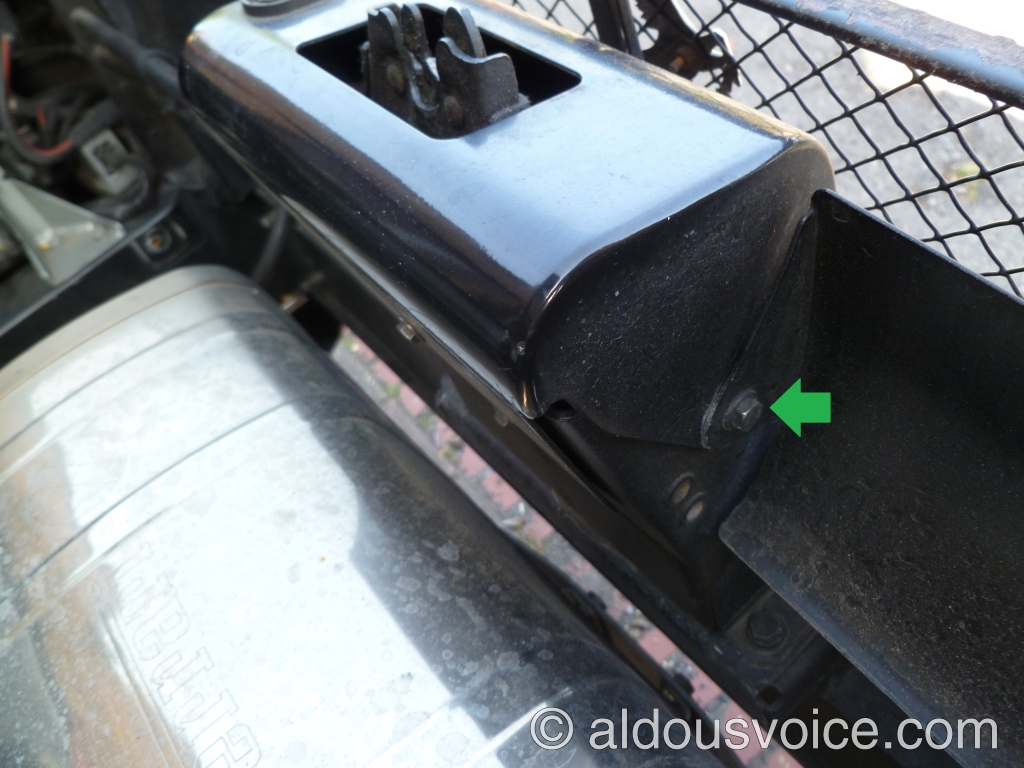
The small rear engine bay trims need to the removed. The LHS trim is attached to the emergency petrol flap release so just shuffle it out of the way. Undo the two (per side) M6 nuts holding the grill to the car (shown in red below).
The two louvres that help evacuate the hot air from the engine bay need to be removed. They are help in place with a M5 nut (green in the photo above) and a M5 bolt (below). The RHS louvre has a cable attached to it – rather than remove the cable, the louvre can be moved out of the way.
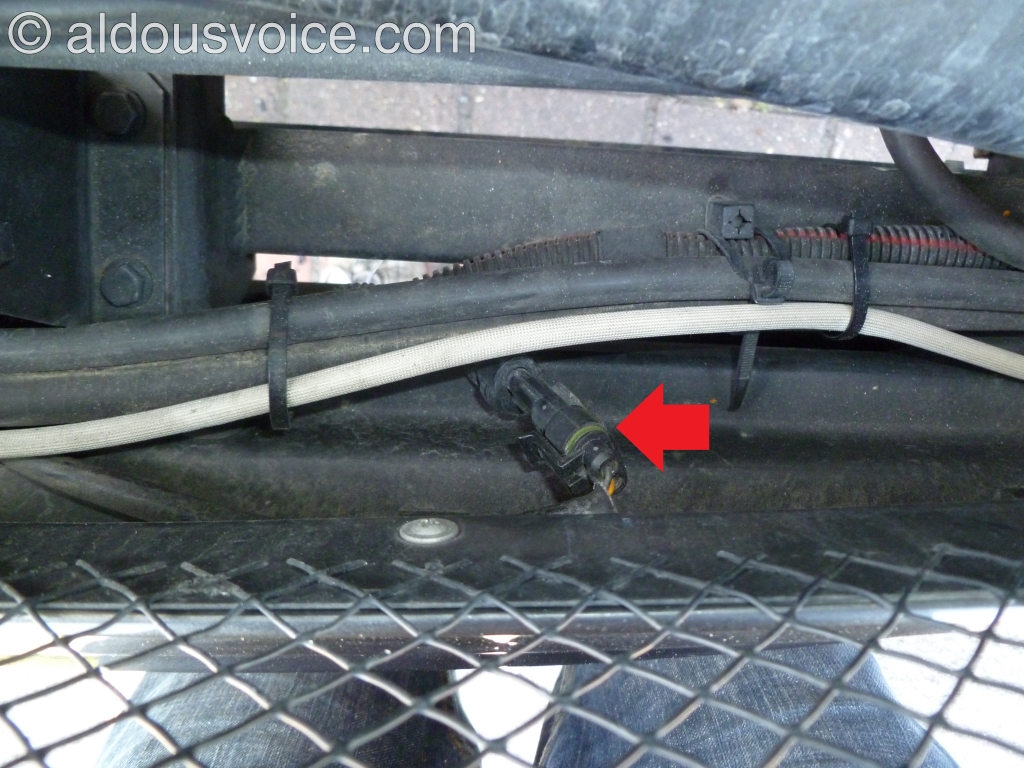
Finally, disconnect the number plate light cable.
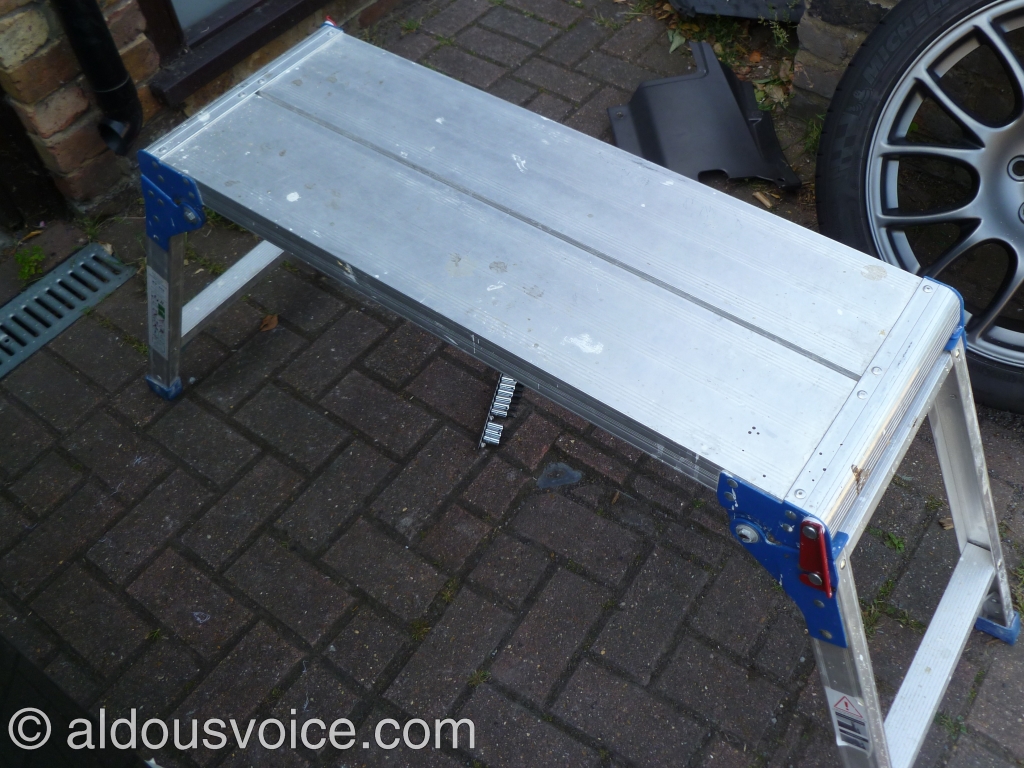
The bumper can now be withdrawn off the car. You’ll need somewhere to place it – I use a builders step that is just the right size to safely balance the bumper on.
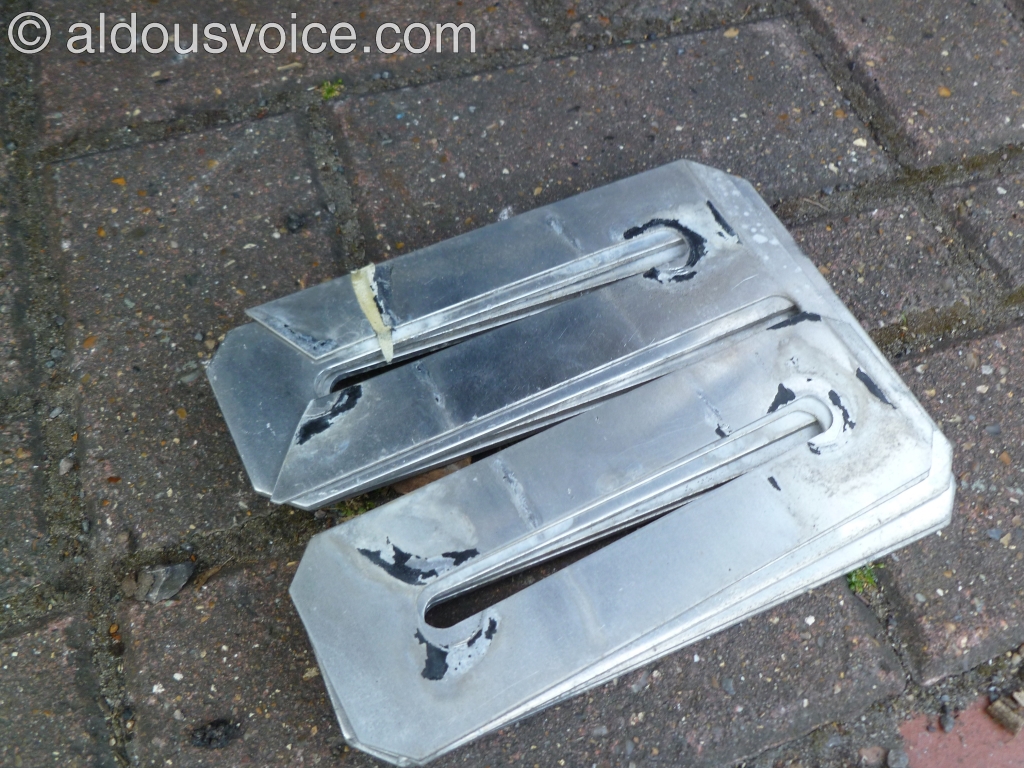
When the bumper is removed there will be a number of spacers and shims on the brackets. Take care to note what goes where for refitting.
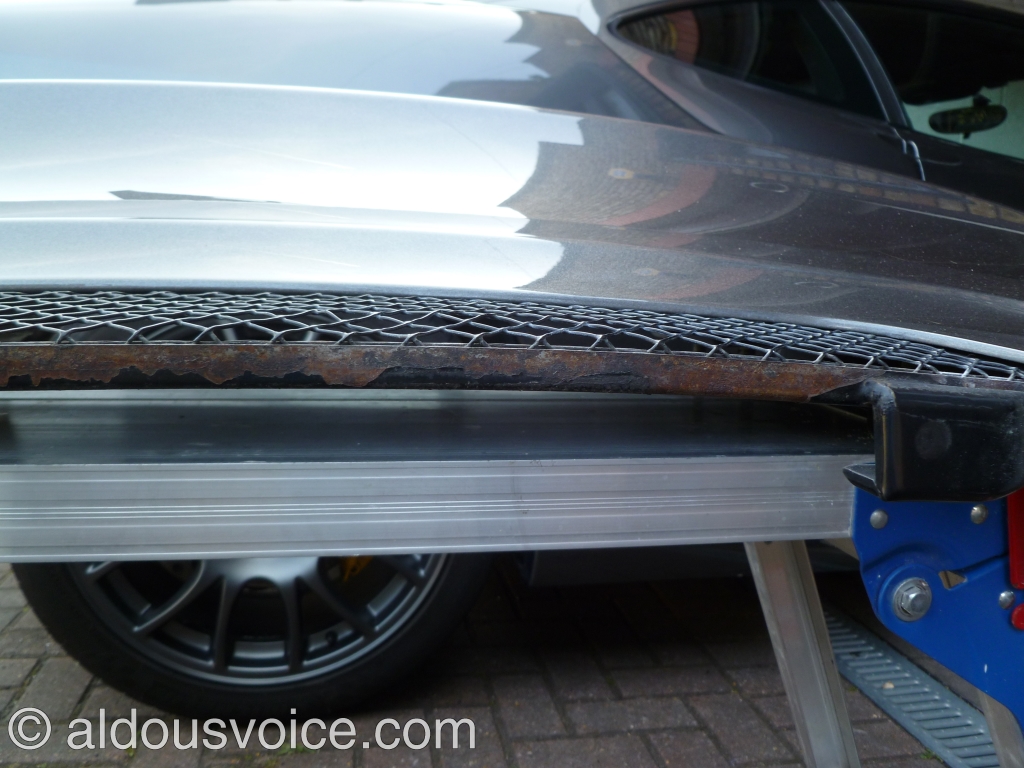
This is the reason my bumper had to be taken off – the rear grill had gone rusty on the top edge. It is a common problem on many F430s and although a local repair is possible I chose to replace with a new part. The grill is held in place with nine self tapping screws.
Refitting the bumper is pretty much the reverse of taking it off. Once the bumper has been slid back onto the car and all the shims are in place, I like to do up the M10 nuts in the engine bay first whilst holding the bumper in the correct position. I then button up the edges before putting the rest back together.
Related posts:
- Ferrari F430 Front Bumper Removal
- Ferrari F430 Front Bumper Repair
- Ferrari 360 Front Bumper Removal
- Ferrari 360 Rear Bumper Removal
- Ferrari F430 Undertray
Other posts in this category:
If you enjoyed this post why not subscribe to this blog for further updates? Simply enter your email address in the box at the bottom of this page. Your email address will not be shared.

Why
I’m not sure what you’re asking…