I recently had to take the front bumper off my car to repair it (more info here) and thought it would be useful to note the procedure down.
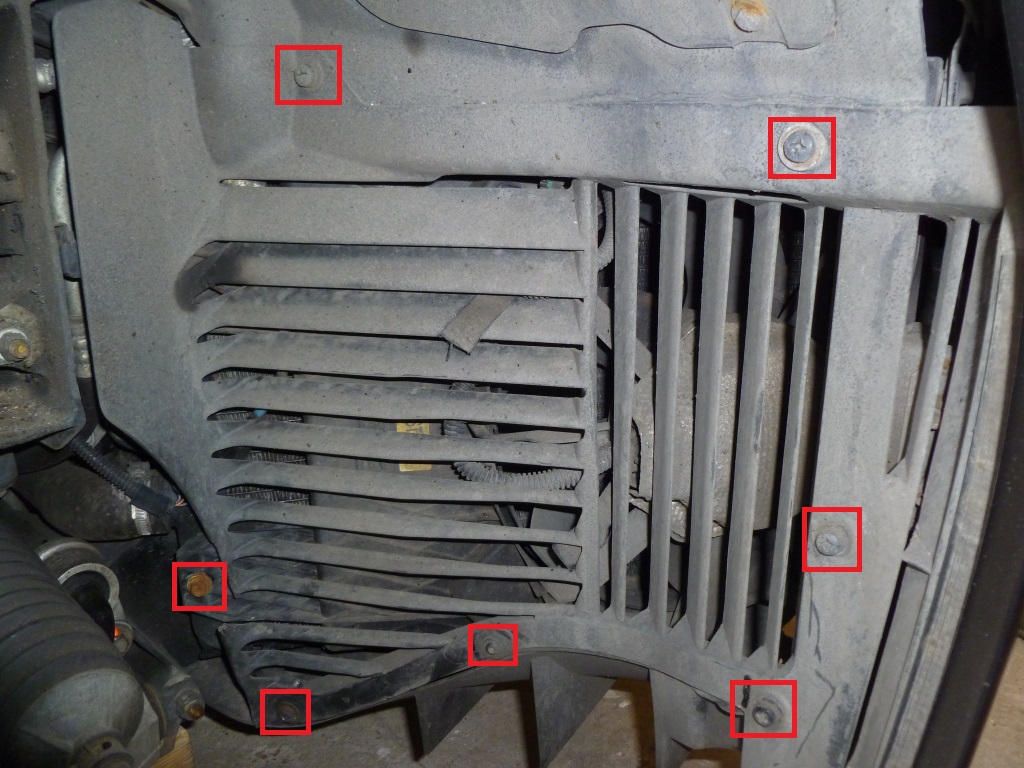
Unsurprisingly, removing the front bumper on the F430 is very similar to the 360. First of all jack up the front of the car and remove the road wheels. This will give you access to the gravel guards that protect the radiators. Undo the seven M6 bolts holding the guard in place and withdraw it from the car (the heads will probably be PZ3).
Once the guards are out of the way undo the two M8 nuts holding the edges of the bumper to the chassis (use a 13mm socket).

Working underneath the front of the car, undo all the M6 bolts holding the front undertray to the bumper (use a 10mm socket). Also undo the M6 bolts holding the front of the under tray to the chassis so that it hangs down (this will allow you to slide the bumper back one more easily).

Working inside the front trunk, remove the four rubber grommets to reveal the four M10 nuts holding the centre bumper to the front of the car. Undo all four (use 17mm socket and/or spanner).

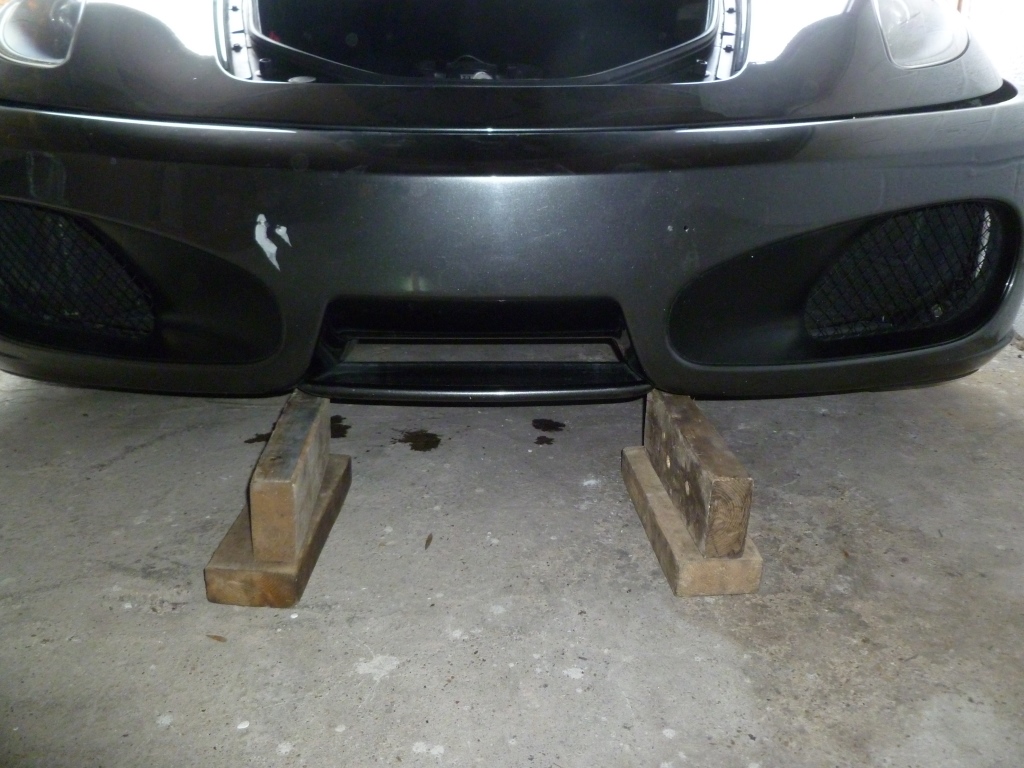
Now the bumper is free of the car – carefully pull it forwards and withdraw it from the car. The pipe connecting the headlight washer jets to the reservoir will need to be unclipped as the bumper comes away. Have something to rest the bumper on and something to drain the washer fluid into. Be careful that it doesn’t tip downwards and scratch the wings (consider masking tape on the wing edges for protection).

Refitting is pretty much the reverse of removal, taking care to note the placement of any shims. I found that the bumper could be supported under the splitter six inches off the floor and be in the correct place to slide right on.
I also found that tightening the edges of the bumper prior to the centre allowed for much easier alignment.

When refitting the gravel guards it is a good idea to fit new stainless steel bolts with a dab of anti seize compound. Use M6x20mm bolts with M6x20mm penny washers – an example is shown below. Also consider renewing the bolts holding the undertray in place – see this post for more details.

Related posts:
- Ferrari F430 Front Bumper Repair
- Ferrari 360 Front Bumper Removal
- Ferrari 360 Rear Bumper Removal
- Ferrari F430 Undertray
Other posts in this category:
If you enjoyed this post why not subscribe to this blog for further updates? Simply enter your email address in the box at the bottom of this page. Your email address will not be shared.

Does this procedure work for a 575? If not, what is the difference?
The 575 procedure is not the same although the bumper has similar mounting points.
Its easy to suck the water out of the reservoir using one of those suction pumps used for oil changes. They arent expensive and are handy for all sorts of things apart from changing oil.
As for the repair to the lugs, new polyester resin doesnt stick that well to old grp – you are better off using epoxy resin which you can get on line or from a yacht chandler. Its much tougher which is why racing yachts are often made from epoxy and carbon fibre rather than polyester and glass.