The rear undertray needs to be removed for a multitude of reasons so I thought it would be useful to note how it is affixed and to share my method of removal and re-fitment without a ramp. The 360 has a very similar undertray so most of what I have written here will apply for that model as well.
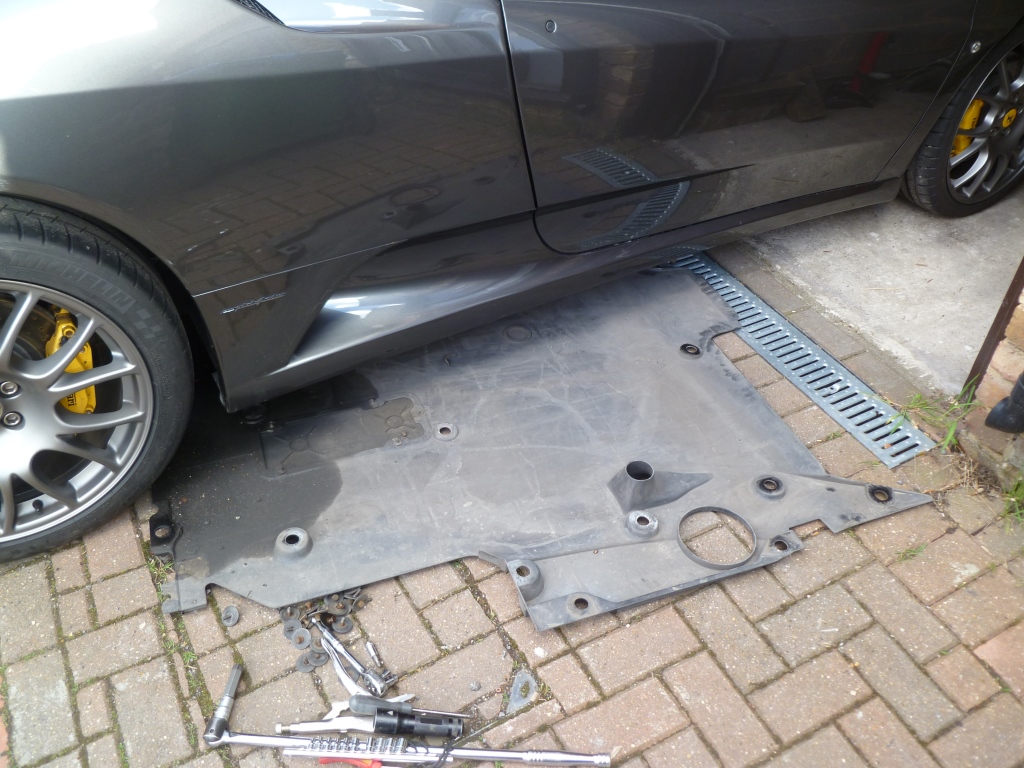
The undertray is held in place with 23 M6 fasteners, all with a 10mm head. The picture below shows the location of the fasteners in red and yellow. The photo is looking at the under side of the tray and the top of the photo faces the front of the car.

It is not necessary to remove the diffuser to get the undertray off but it does give you a little more room to work from the rear of the car. It is however necessary to loosen the two bolts that secure the centre undertray to the car as the rear undertray is tucked underneath.
In order to remove the undertray without a ramp I reach in from the sides and undo the bolts. If the car is particularly low then a few inches can be gain by jacking up the car and putting a couple of small blocks under the rear wheels. The undertray cannot be removed whilst the car is supported on the rear jacking point. Once all the fasteners have been removed the undertray can be moved forward and slid out from one of the sides.
Most of the fasteners are likely to be corroded. I replace them with stainless steel fittings – try to buy A4 stainless steel if you can as it holds up better to the elments. You will need:
- M6 x 20mm Full Threaded Bolt (qty 23)
- M6 x 35mm Penny Washer (qty 21)
- M6 x 25mm Penny Washer (qty2)
- M6 Form A Washer (qty 23)
There are a few other fasteners on the other under trays so if you buy enough to do 50 you should be good for the whole car. The smaller penny washers go on the two points shown in yellow in the top picture above.
You may find that the spire clips holding the leading edge of the diffuser to the undertray are corroded. They are M6 spire clips – I buy mine from Speedy Fasteners.

When fitting the new fasteners I like to put a dab of anti seize grease on the threads.
Refitting the under tray requires a little planning. There are two pipes that have to be threaded through the undertray – the locations are shown in the green squares in the top picture above. The larger pipe to the side takes any fluid from the fuel cap and drops it onto the ground. It is very important that this is fitted properly as you wouldn’t want any petrol draining into your engine bay. The second, smaller, pipe is the coolant tank over flow.
If you haven’t already taken the diffuser off, remove it prior to refitting the undertray. I position the undertray in place and, working from the rear, loosely fasten the rear centre middle mount. This allows me to reach in and feed the coolant overflow pipe through. I then move to the side and feed the fuel overflow pipe through and loosely bolt up that side. I then go to the other side and loosely bolt up that side. Now the undertray is in place on the car, I work from the centre out bolting up tight.
All that’s left is to fit the diffuser and you’re good to go.
Other posts in this category: General Stuff
If you enjoyed this post why not subscribe to this blog for further updates? Simply enter your email address in the box at the bottom of this page. Your email address will not be shared.

Another really useful post Aldous. Many thanks.