If there’s one thing I can guarantee that all 360 or F430 cars will need replacing during their life it would be balljoints. Ferrari decided to fit rose joints (called heim joint in the US) where the hub attaches to the wishbones. The OEM joints are made from chrome plated mild steel – when the chrome wears off, moisture corrodes the steel and failure isn’t far behind.
For quite a few years Ferrari wouldn’t sell the balljoints on their own so if you wanted an OEM replacement then you had to buy an entire new wishbone with the joint pre-fitted. This has changed now but the joint material remains the same so unless you are getting them under a warranty they really aren’t worth buying.
Fortunately, there are some aftermarket alternatives. Hill Engineering sell stainless steel ball joints and, in my opinion, one doesn’t need to look anywhere else. There are cheaper alternatives out there (Prosport sell some) but I believe that they are inferior for two reasons. Firstly, the Hill joints have a groove cut into the stem under the head. This groove seats the dust cover which helps keep moisture and debris out of the joint. The Prosport joins do not have this groove. Secondly, the Hill joints are individually calibrated to ensure they contain precisely the correct amount of lash required – too much or too little and the joint will wear prematurely. In my opinion, spending the extra on the Hills joints is worth every penny.

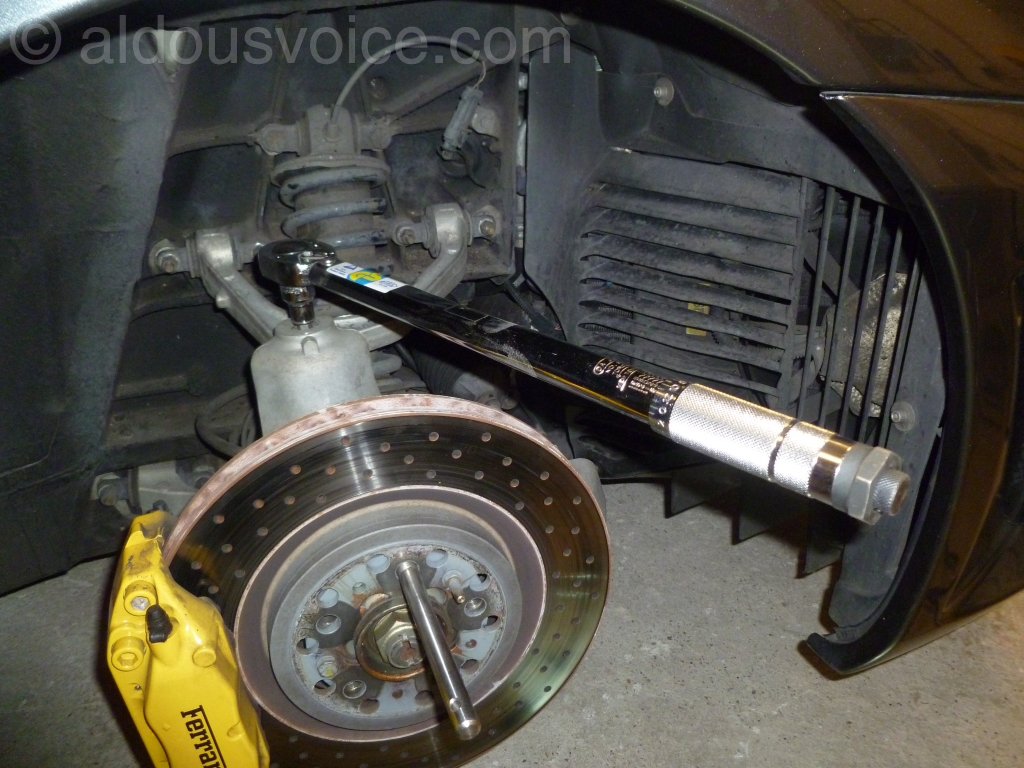
Replacing the ball joints is fairly straightforward. First of all jack up the car, support the weight and removed the wheel.
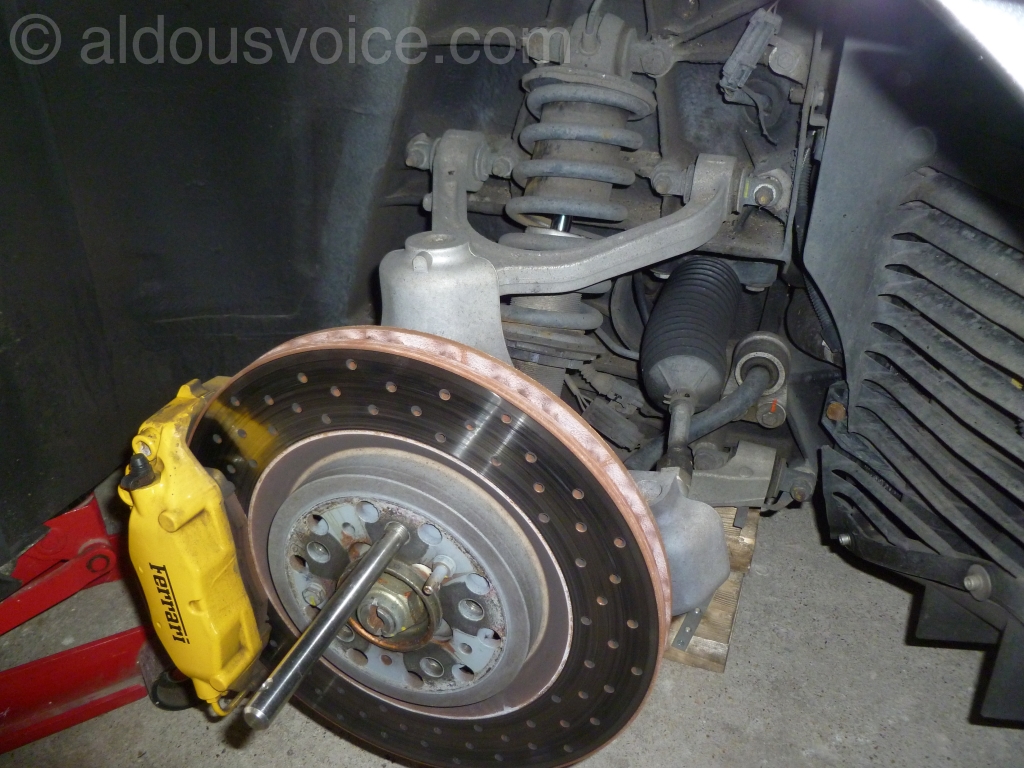
Next undo the bolt holding the hub to the wishbone. In this case I was attending to upper ball joints but if you need to replace the lower ones then the shock absorber needs to be detached from the wishbone first.
When removing the bolt, take care to ensure the hex bit is fully seated in the head. You will need a long breaker bar to get it started.

Also ensure that you don’t lose the balancing spacer (shown in the picture below) when you withdraw the bolt.

The hub will need to be supported – I use a bungee but zip ties or some chord would suffice.

Now undo the four M8 nuts holding the wishbone to the chassis. Be careful to note the position of any spacers – if they are not put back the same way as they came out then the geometry of the car will change!
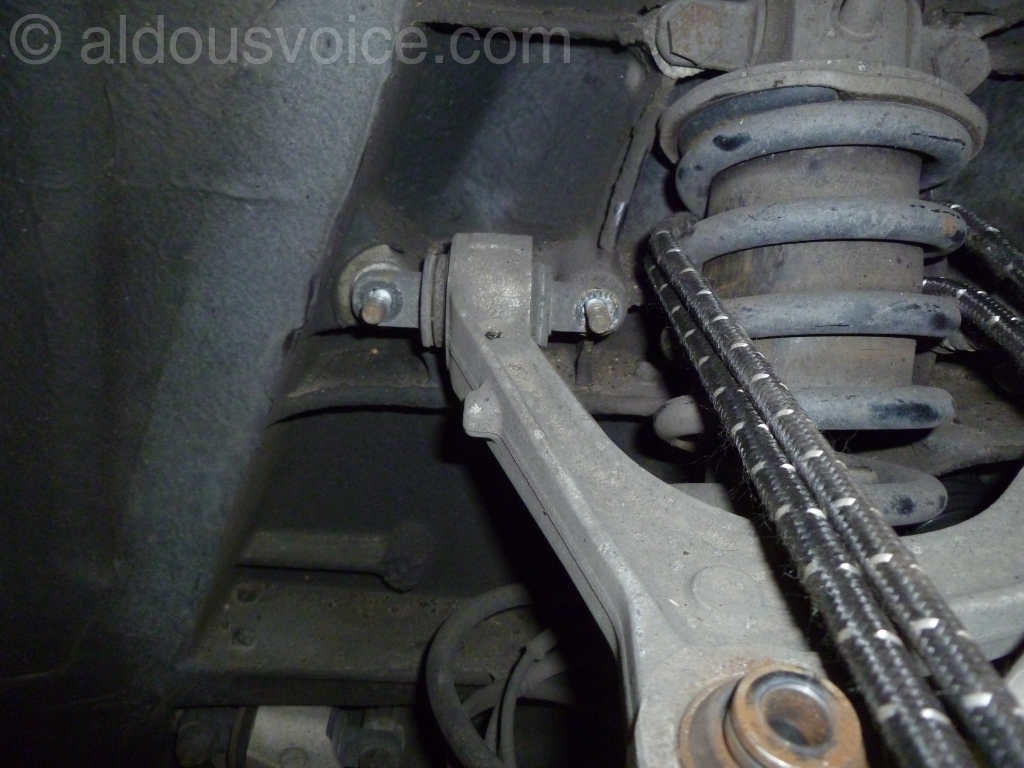
The wishbone can now be removed from the car.
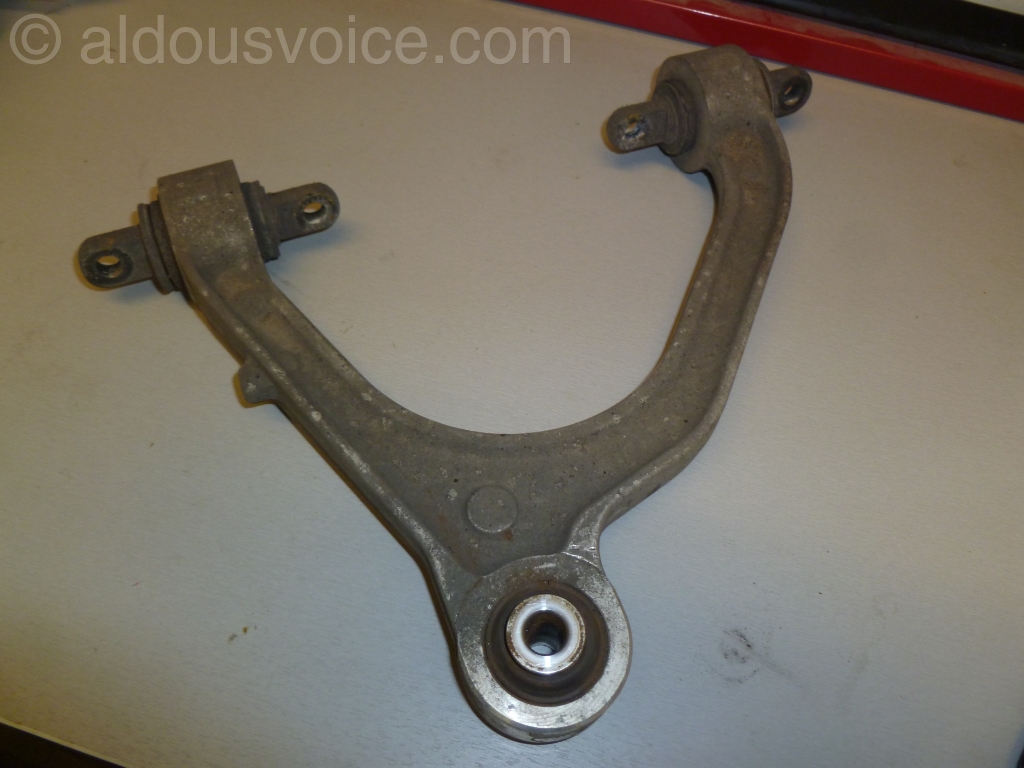
The dust covers are removed with circlip pliers.

Once the dust covers have been removed, the joints can be inspected. Although these looked OK, there was play so they had to go.
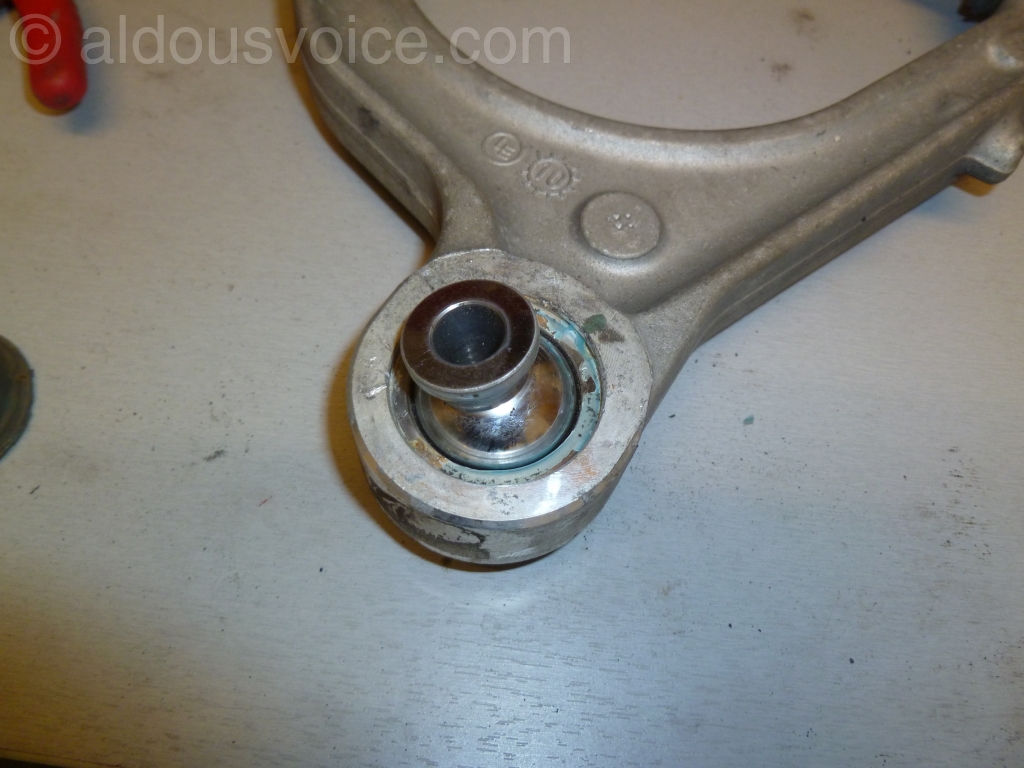
The joints are an interference fit in the wishbone and need to be pressed out. You can buy a tool from Hill Engineering but I use a couple of pieces of aluminium that I turned up on my lathe.

Before pressing the joint out, heat up the wishbone to break the glue bond.

Old vs new:

The inside of the wishbone needs to be carefully cleaned up. I use a small plastic spatula to get the glue residue off. Inspect the surface for damage.

Next the ID of the hole needs to be measured.
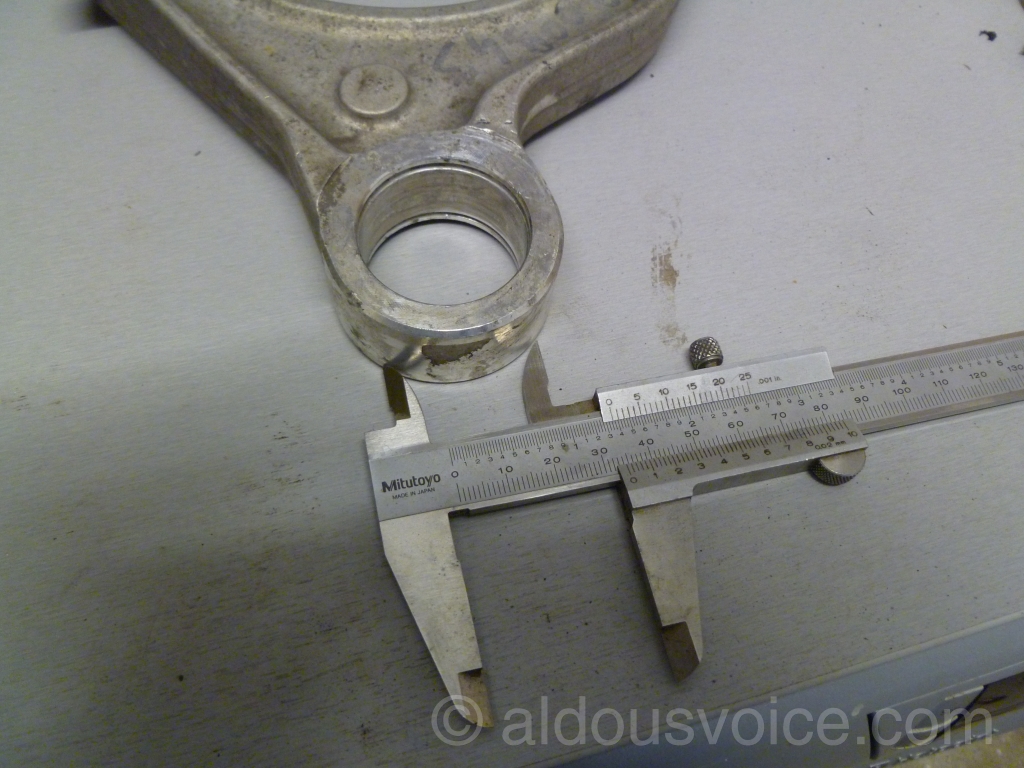
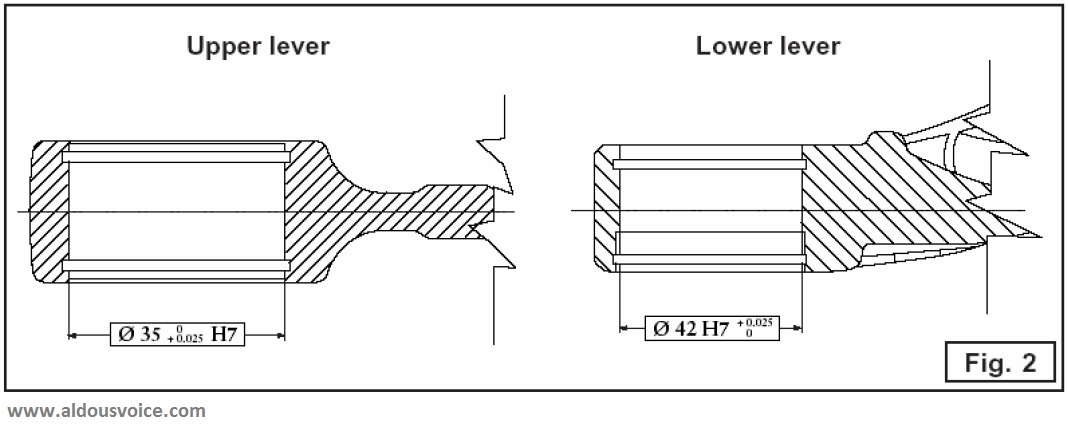
Here are the specs (dimensions in mm):
The joint is glued into place. The correct adhesive is Hysol EA9360 and can be bought from Hill Engineering. Although it is fairly expensive for what it is, I wouldn’t want to try and use anything else on a critical suspension part. Note that the glue can be kept for long periods if you store it in a fridge and take care to ensure the two parts don’t mix.
It is a two part epoxy and needs to be mixed thoroughly, the working time is quite long so there’s no rush. Apply a small, even smear to the outside of the ball joint. Take care not to get any on the inside of the joint.

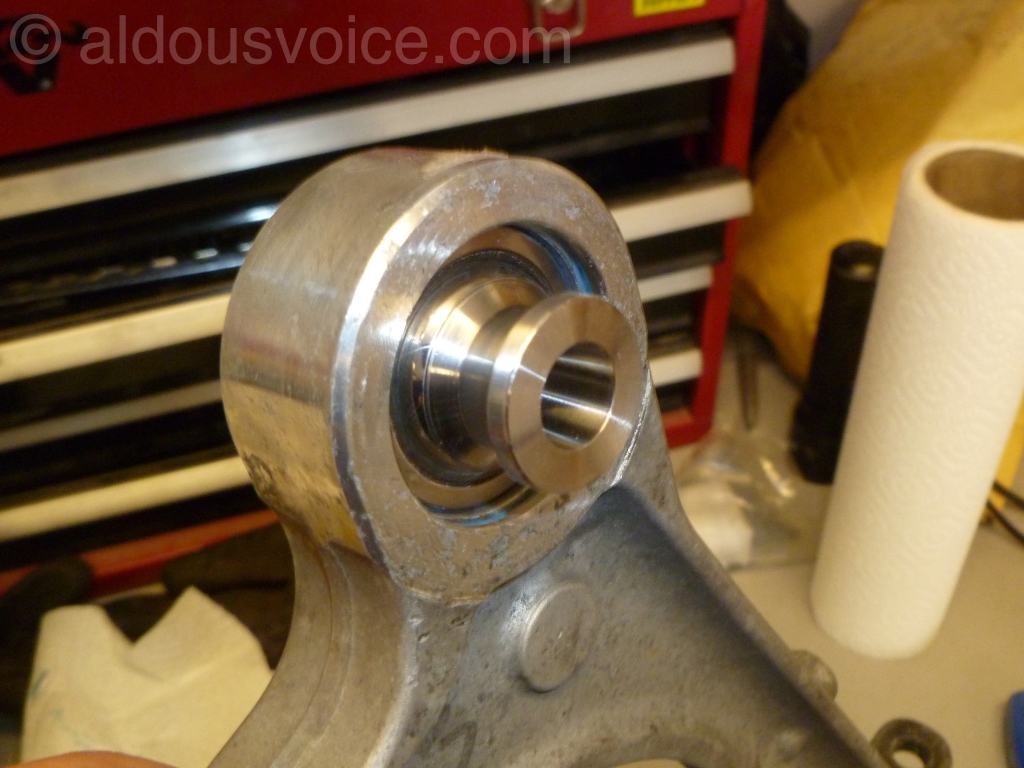
Now the new joint needs to be pressed into the wishbone. Fit one of the old dust covers on one side of the arm to provide stop and prevent the joint from being pushed too far in. Heat up the wishbone to make the hole slightly larger (also the glue will flow better when it touches a warm surface). Note the below picture was staged without the glue as I needed both hands to perform the operation.

Remove the old dust cover and mop up any excess glue (I use Isopropyl Alcohol). Take care to get it out of the grooves the dust covers sit in otherwise the covers will be bonded in place.
Fit the new dust covers. I like to seal up the circlip holes with silicone – I get a blob and wipe it with my finger round the whole cover. Normally I would use a clear silicone but for the purposes of this picture I used white to make it stand out.

Next the glue needs to set. Ferrari call for the arm to be baked at a low temperature for quite some time. I heat up the wishbone with a low setting on my heat gun in order to get the chemical reaction going. I then place it in a warm place – in this summer weather the garden table was perfect.
Once the glue has set the wishbone can be re-fitted to the car. The bolts attaching the arm to the chassis are done up to 25Nm – don’t forget to put all washers and shims back in the same place.

I like to mark the bolts with Torque Seal in order to keep an eye on them.

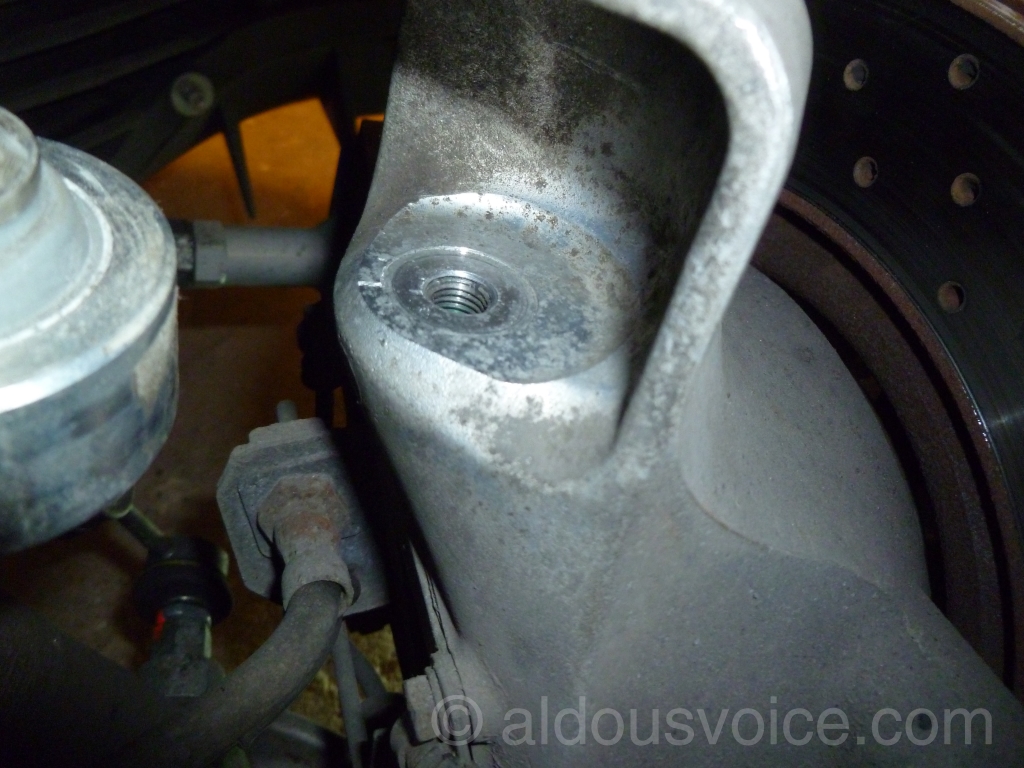
Before fitting the wishbone to the hub, clean up the seat where the joint rests:
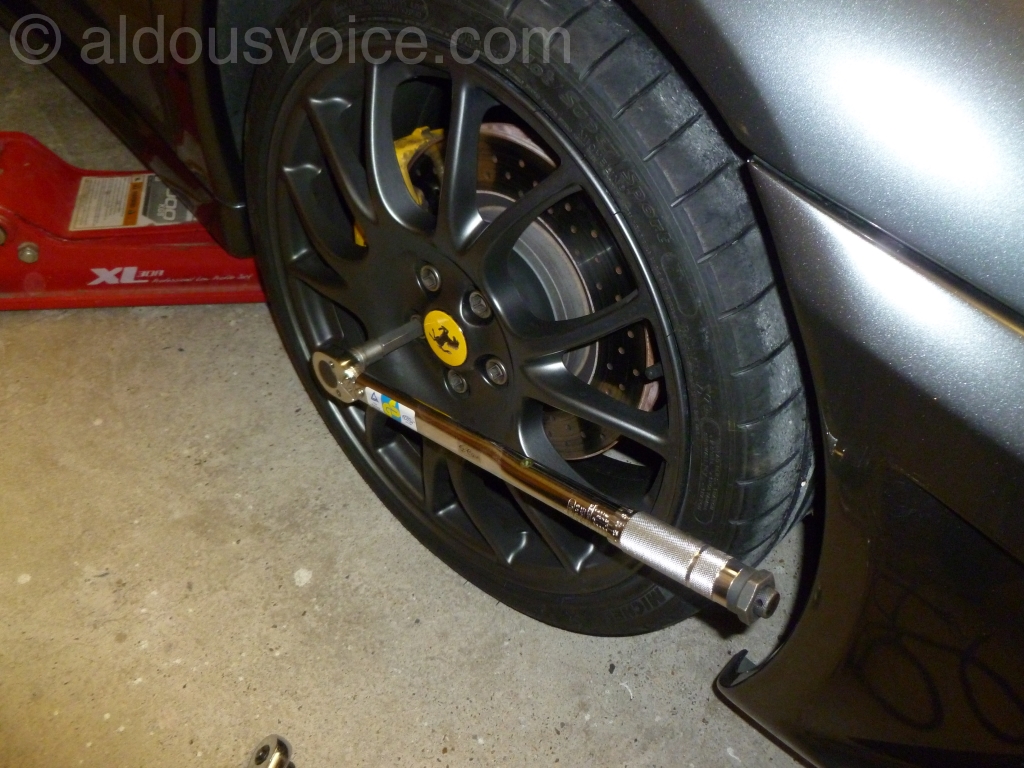
The bolt needs to be torqued up (65Nm upper, 85Nm lower).
All that’s left is to re-fit the wheel and torque up the wheel bolts (98Nm).
Related posts:
- Ferrari 360 & F430 Ball Joint Replacement
- Ferrari 360 & F430 Track rod End Replacement
- Ferrari 360 & F430 Track Rod Ends
- Hill Engineering Track Rod Ends
Other posts in this category: Suspension
If you enjoyed this post why not subscribe to this blog for further updates? Simply enter your email address in the box at the bottom of this page. Your details will not be shared.

Voicey, how did you get the bolts back in with those stupid balancing spacers? i really struggled when I had my wishbones off for cleaning and painting wasn’t sure if there was a technique.
That is a very good question and one that I should have written up. I get the bolt started in the threads without worrying about letting the balancing spacer drop down. Once the bolt is in the threads I use a pry bar to push the balljoint upwards – this pushes the balancing spacer back up into its proper place.
Great write-up as always…thanks!
Is this what is making the clunking sound I get when I go over bumps?
Yes – more than likely. Jack up the car, take the wheel off and jack up the lower wishbone to take the pressure from the shock off the hub. Use a pry bar to check for movement at the top and bottom joint.
Thanks.
Hi, I must tell you that I love your web site and all the topics you have covered. It appears your site is one of a very few places where the information is right on! Thank you.
I do have a question you may be able to help me understand the solution. I installed a set of Ferrari Fiamm air horns in my 360. They worked well but all of a sudden I started to blow the 15amp fuse in the fuse box.
Any thoughts? Was I supposed to insert a horn relay, rather than just connecting the compressor to the 360 horn wiring?
Thanks for any help.
John Nastasi, Colorado, USA.
Sent from my iPad
>
Hi John,
Thank you for your kind words. Sadly, diagnosis over the internet is almost impossible but I will have a go. Which fuse is blowing? Where did you install the horns? When does the fuse blow – randomly or when you press the horn button? What is the current rating of the air horns?
Regards,
Aldous.
Great write up Aldous. Hope you’re enjoying the 430!
David
Hello Aldous
I’m in the middle of changing a lower ball joint and have purchased a hill eng. part.
On fitting the new one I’ve found that it is a slide fit, not requiring pressing in.
The dimension on the wishbone ID is within spec. (actually 42.02mm) – the new bj OD is measuring 41.95mm.
The old which I’ve removed also measures 41.95mm and also appears to be a hill part.
I’ve held off until I speak to hill eng. tommorow but do you have any thoughts on this?
Cheers, Mike
Hi Mike,
How much play is there when the ball joint is inserted? If it is a snug fit then I would say the adhesive will take care of the 35 micron gap. If it rattles around then you may have an issue.
Please let me know what Hill say.
Cheers,
Aldous.
I’ve found a pretty comprehensive manual online which I’ve downloaded tonight – you may have it? –
Click to access Workshop%20Manual%20F430%20Spider.pdf
The ball joint procedure starts on p.461 This doesn’t ask for a press to be used for fitting the new joints so I’m a bit happier for now. Will phone hill’s tom and come back to you with their comments.
Cheers, Mike
Apologies for the (very!) delayed response. I did speak to Hill engineering who stated ‘parts are made to the manufacturers dimensions and tolerances’. As both wishbone and the new balljoint were, I completed the rebuild.
I did around 1200 miles before the car came off the road in November and had no issues whilst driving and there is no play in it so I can say that it is fine.
I’m in the middle of carrying out minor repairs (anti roll bar bushes, front discs, all pads, front bumper tabs broken, repair of rear light housings) and have found your website an excellent resource to assist me. Thanks.
During maintenance I’ve found that the F1 actuator has a slight oil leak. It appears to be coming from the actuator black casing gasket. I’ve had no issues with the F1 system whilst driving. Do you have experience with this?
Cheers, Mike.
Hi Mike,
The actuator wont be leaking from the gasket, it’ll be leaking internally – the black casing isn’t supposed to have any fluid behind it. There’s not much that can be done other than to try and seal up the black case.
Cheers,
Aldous.