I spent this morning with my friend, and fellow Ferrari owner, Valerio. We decided to try out a vacuum kit he built in order to facilitate changing the coolant. We did this on his 360 and my F430 and the procedure was, for all intents and purposes, exactly the same.
The reasoning behind using a vacuum to assist with changing the coolant is to prevent having to bleed the system. After the coolant has been dropped out, the system is put under a vaccum and this is used to draw the fresh coolant into the system without leaving any air pockets.
Here is Valerio’s kit before it was built up:

The parts list was as follows:
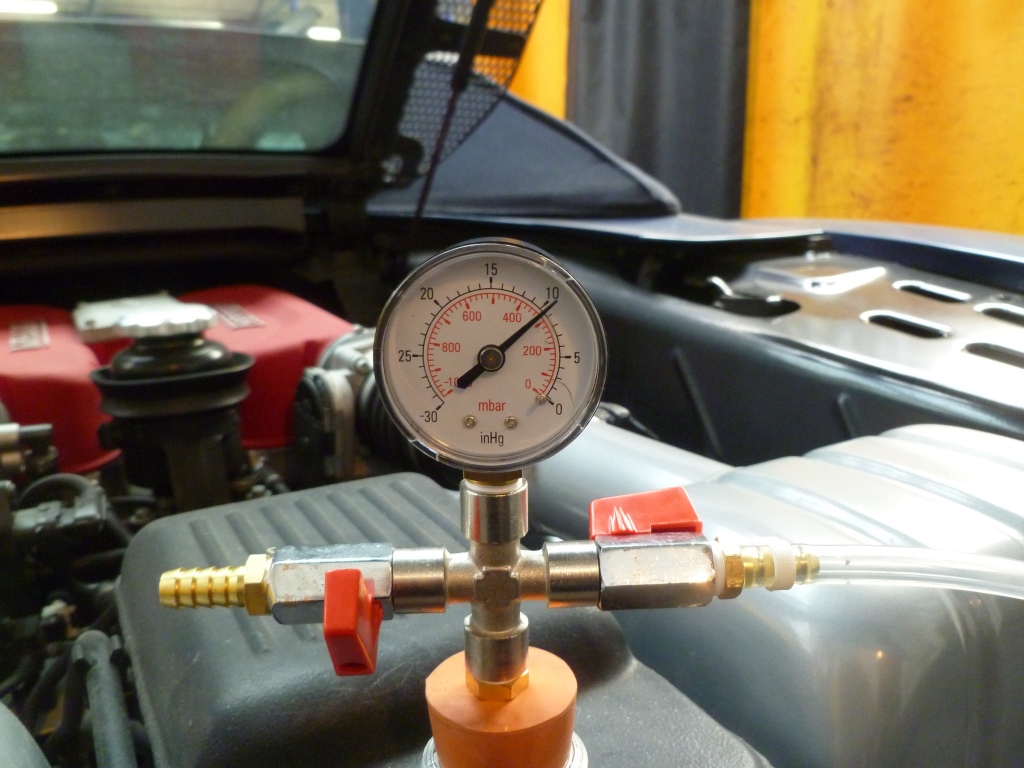
- vacuum gauge 1/4″ BSP
- four-way 1/4″ BSP female cross
- 6mm hosetail into 1/4″ BSP male
- 2x 10mm hosetail into 1/4″ BSP male
- 2x 1/4″ BSP male-female ball valve
- 33mm-38mm rubber bung (the inner diameter of the expansion tank neck is 34mm)
- PTFE tape
- 10x nitrile 11.5mm outer diameter/2mm (or 1mm) section O-rings
- 2x 9-12mm diameter jubilee clips
- 2m clear PVC tubing, 10mm inner diameter
- bayonet quick-connect air fitting into 10mm hosetail
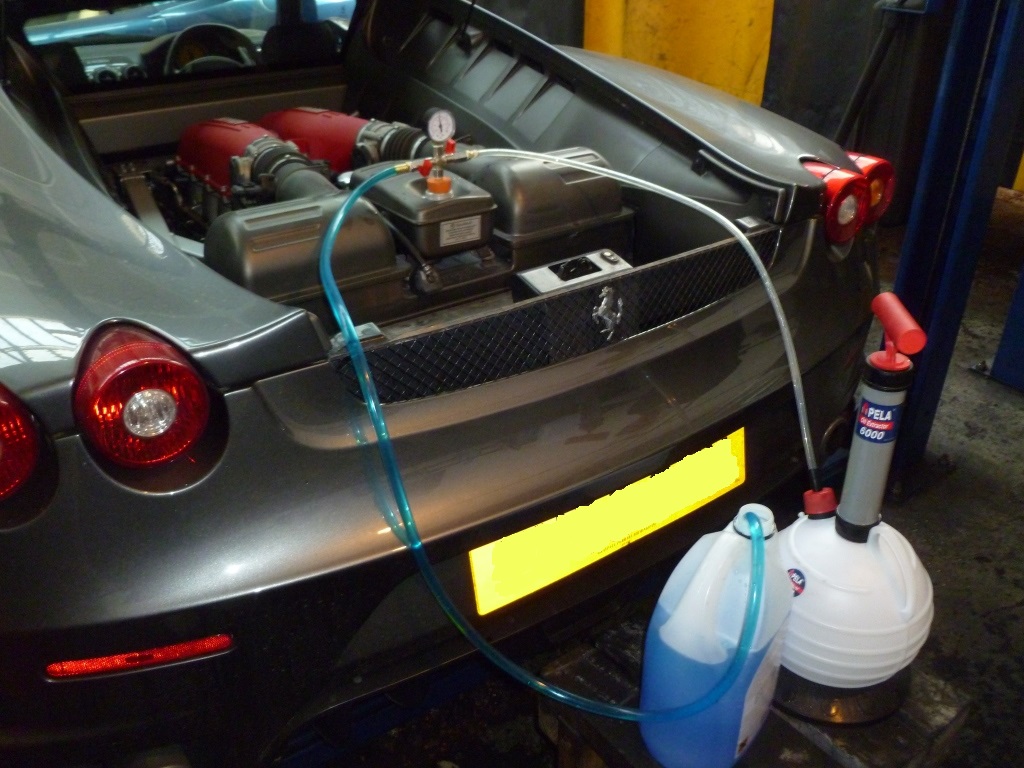
We used a Pela 6000 Pump to pull the vacuum. Here’s Valerio on how he put it together:
All the items with male BSP connectors had a tapered connectors, so PTFE tape was enough (even if the photo shows O-rings), except the ball valves, which had straight BSP males. O-rings are necessary when mating a straight BSP male to a BSP female.I drilled an 8mm hole into the bung and forced a 10mm hosetail connector into it. The PVC pipe that comes with the PELA pump has an inner diameter of less than 6mm, so a 6mm hosetail is a good tight fit. Even though the photo shows a jubilee clip next to that hosetail, as you saw I used a cable fastener instead since even the smallest jubilee clip was too large (the outer diameter of the PELA pump hose is 10mm).
.
The first thing was to remove the front under tray – the 360 and F430 have very similar panels, held in place with a variety of M6 bolts and screws.
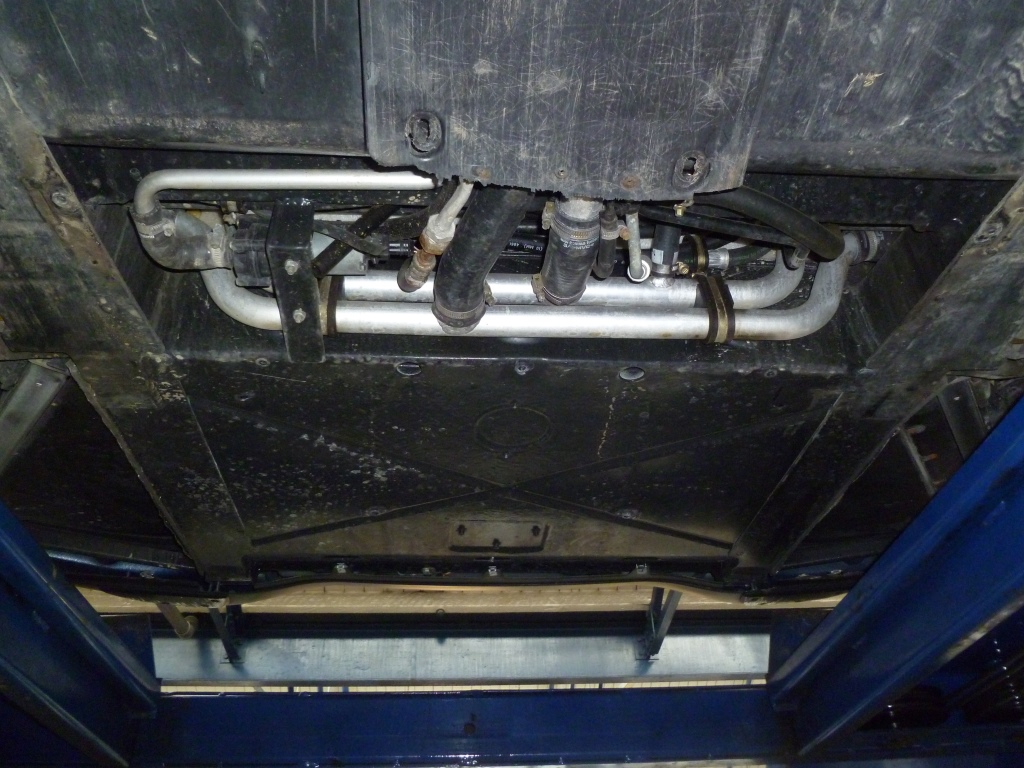
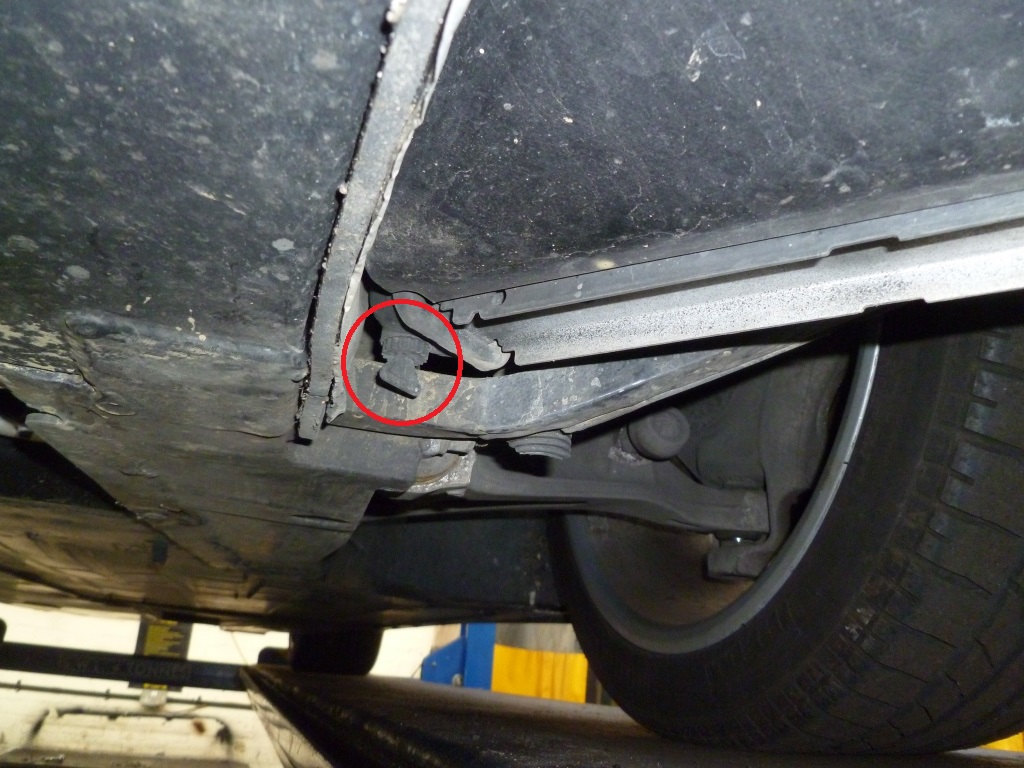
Next we dropped the coolant out. There is a drain plug at the corner of each radiator:
Whenever I remove fluid from a car I always measure how much came out so we used a funnel and a bucket to catch most of the fluid.

I advise to take a sample of the coolant as it is draining out. Use a clean container to catch enough to check for any oil mixed in – if you see any oil then it is possible that your water/oil heat exchanger has failed. Fortunately, neither of our cars had any oil in the coolant.

Just draining the radiators releases about 6 litres of coolant (both models hold approximately 17 litres). In order to get more out we used Valerio’s kit to gently blow compressed air into the system whilst the drain plugs were open. We managed to get 9 litres out of the 360 and 11 litres out of the F430.
Next we re-fitted the drain plugs and used the kit to pull a smallish vacuum from the system. We left it under the vacuum for 5 mins in order to check for leaks (which would have been evidenced by the gauge dropping).
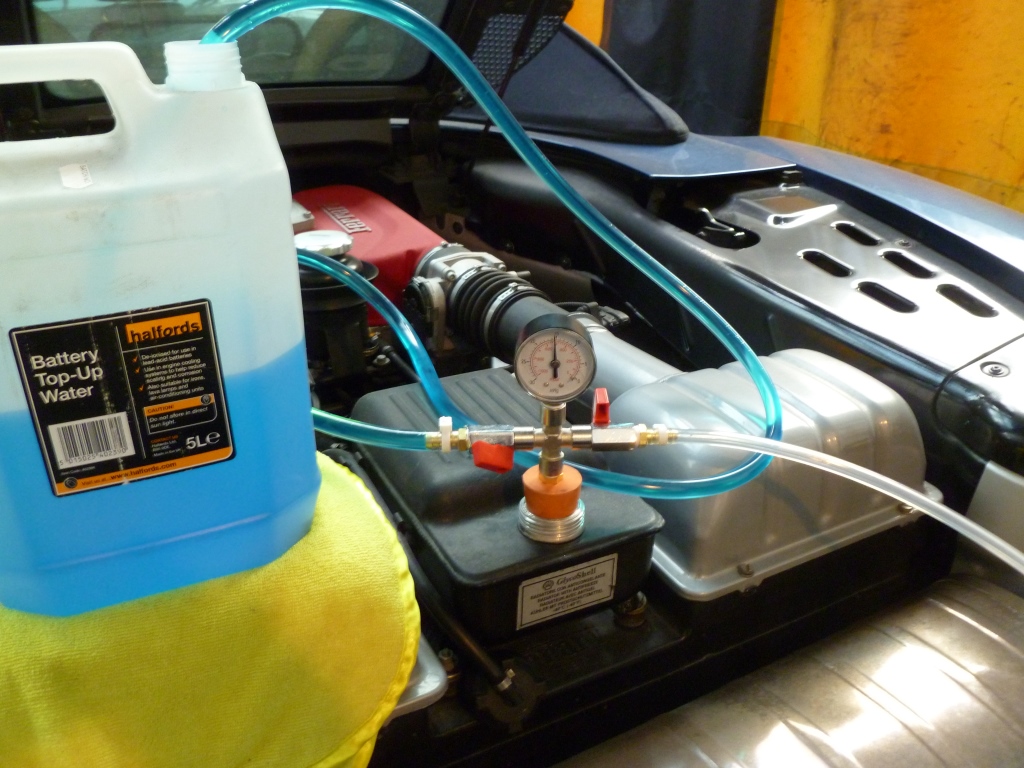
In the meantime we mixed up the coolant. Ferrari specify Glycoshell mixed 50:50 with water. Glycoshell is hard to find but it is only a Glyco based antifreeze any similar type will do. I advise to mix it with De-ionised water in order to help prevent the build up of deposits in the system. I buy mine from Halfords as battery top up water – with a trade card it only costs £1 for 5 litres.

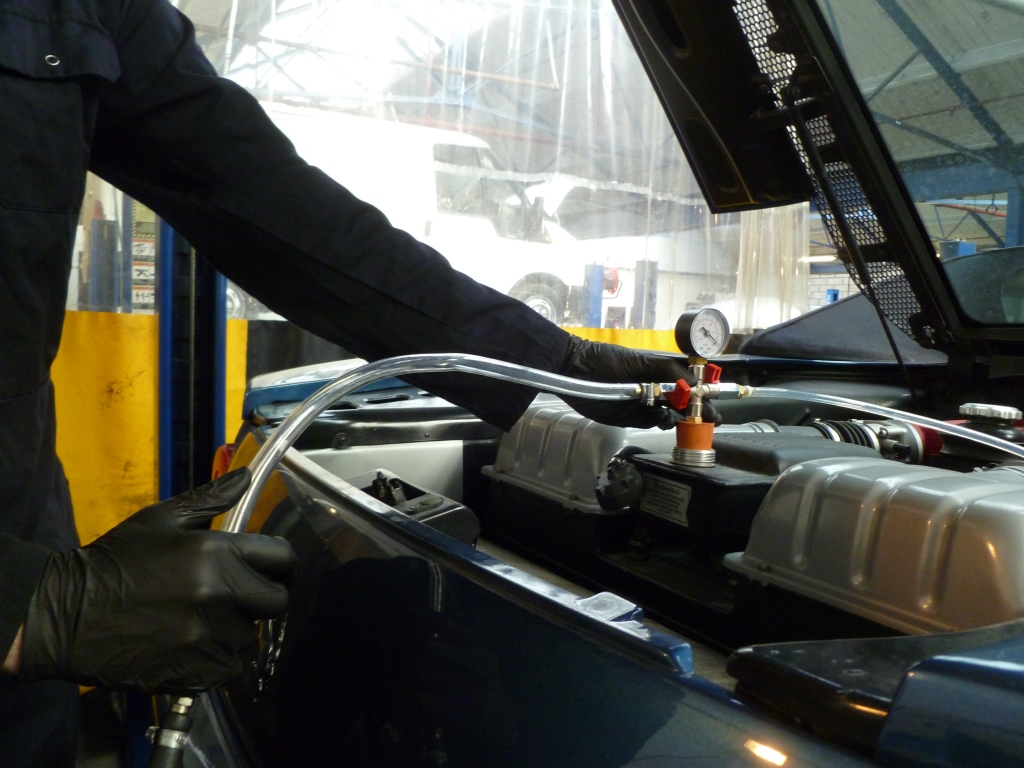
Next we fitted the kit to the expansion tank and pulled as much vacuum as we could.

Once we had a decent vacuum in the system we closed the valve to the Pela pump and opened the valve to the coolant which was then sucked into the system.
The cap was then refitted and the car run up to temperature. Once it had cooled down the level can be topped off (40mm below the top of the threads). Don’t forget to refit the under tray.
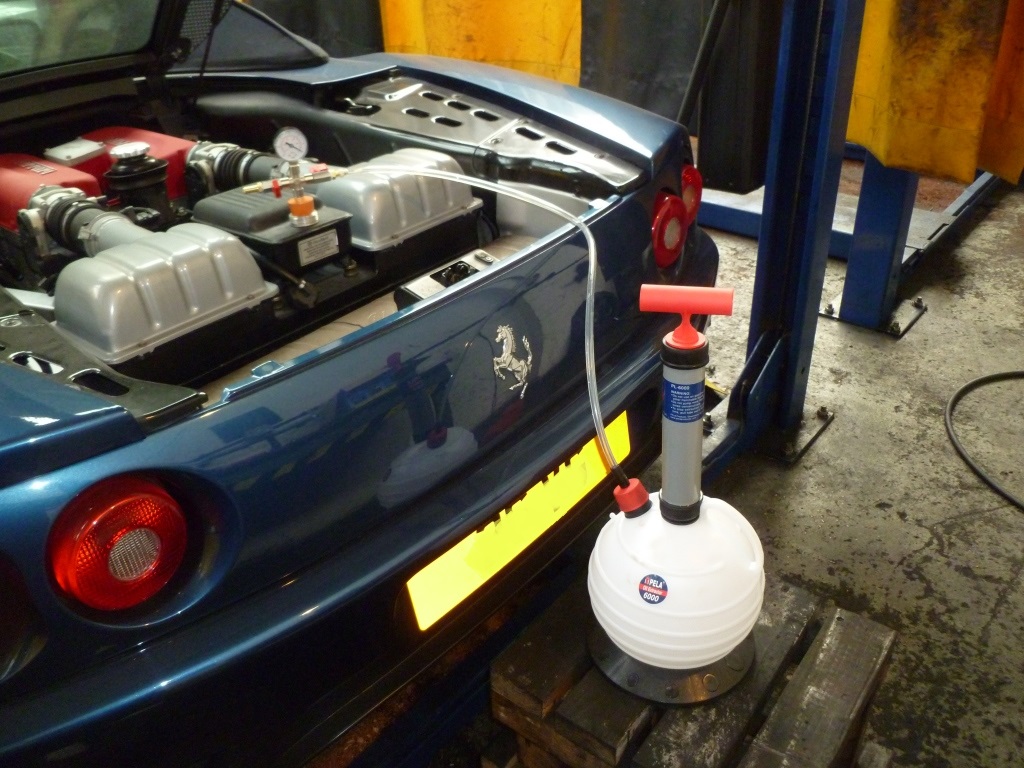
Here’s the kit in action on my F430:
Some lessons we learnt:
- Pull as much vacuum as possible. Once you think you’ve pulled enough, pull some more.
- Use the pump to remove the air out of the hose that feeds the coolant from the bottle.
- Once about 2.5 litres had been drawn in, close the coolant side and pull some more air out of the system. Repeat every 2.5 litres.
- Don’t let the hose curl up in the bottle of coolant, otherwise it’ll allow air in as the level drops.
This system was inspired by a kit available in the USA. There is a similar kit available here made by Bergan but we found it to be useless, hence why Valerio built this kit up. Total cost was about £60 so worth while if you plan to keep your car for a while.
Related posts:
Other posts in this category: Maintenance
If you enjoyed this post why not subscribe to this blog for further updates? Simply enter your email address in the box at the bottom of this page. Your email address will not be shared.

Thanks for the write-up Aldous! I would also like to thank user T-Cut from the 75 and ZT forum who first proposed using the PELA pump – here’s his how-to guide: http://www.the75andztclub.co.uk/forum/showthread.php?t=41864
Thank you for the write up, Aldous, truly appreciate it. I’ve used your guides in the past. I am planning on changing the coolant fluid this week or next. Do you think it is okay to use blue BMW antifreeze in an F430? Specifically, this kind:
http://www.ecstuning.com/BMW-E90-335d-M57_3.0L/ES196290/
Hello Aldous again. I have one humble question to ask about my 360’s symptom related with cooling sys.
In regulat decent drive, coolant and engine temp has no problem
But as after I floored 3 tunnels earlier this day,
Engine temperature is ok but he coolant temp rises up to near red zone so I pulled over and checked the collabt reservoir and the coolants were gone.
I topped it about 4 liters and it was filled.
Checking The bottom of the car for any visual leak on the floor, there wer none and the floor was dry without a drop of a coolant
I restarted the car after 20min or so, and drove again and the engine temp has no problem but the coolant’s average temp is staying up to 95C just before reaching 100C.
So i again stopped the car and checked the reservoir and no reduction, full as I filled it ealier.
I usually drive it oyr every 2-3weeks and one thing I always noticed before starting the car was a vet small amount of thin oil like substance floating in the coolant reservoir.
Now I’m sitting on he street near 360 waiting for it to cooled down conpletely for nearly an hour now.
It’s 59000km ran and I had been done every possible maintenance in last 3 months under while reading and learning your priceless infos
1. Every possible oil and fluid changed
– engine
– trans
– f1
– power steering
– coolant
– brake fluid
2. All Spark, ignition coils changed
3. Tire and rotor, pads changed and so on…
I would very much appreciated for your advise.
Thank you again
From Korea. Jey
If you’re losing coolant from the tank with no visible leak and have oil in the coolant you likely have a failure of the heat exchanger.
I personally wouldn’t drive the car until the gearbox oil had been removed and inspected
Thank you Aldous. I will certainly check heat exchanger. Is this fixable? Or replacing is the only way? I better study about mechanism of heat exchanger. I will come back to you as soon as heat exchanger being replaced or fixed.
If the heat exchanger is compromised then the only solution is replacement. However, this is only half the story – you need to remove all traces of oil from the cooling system and all traces of coolant from the gearbox. Then you need to cross your fingers that the diff plates aren’t damaged…