Getting the side skirts off a 360 is fairly easy albeit fiddly job.
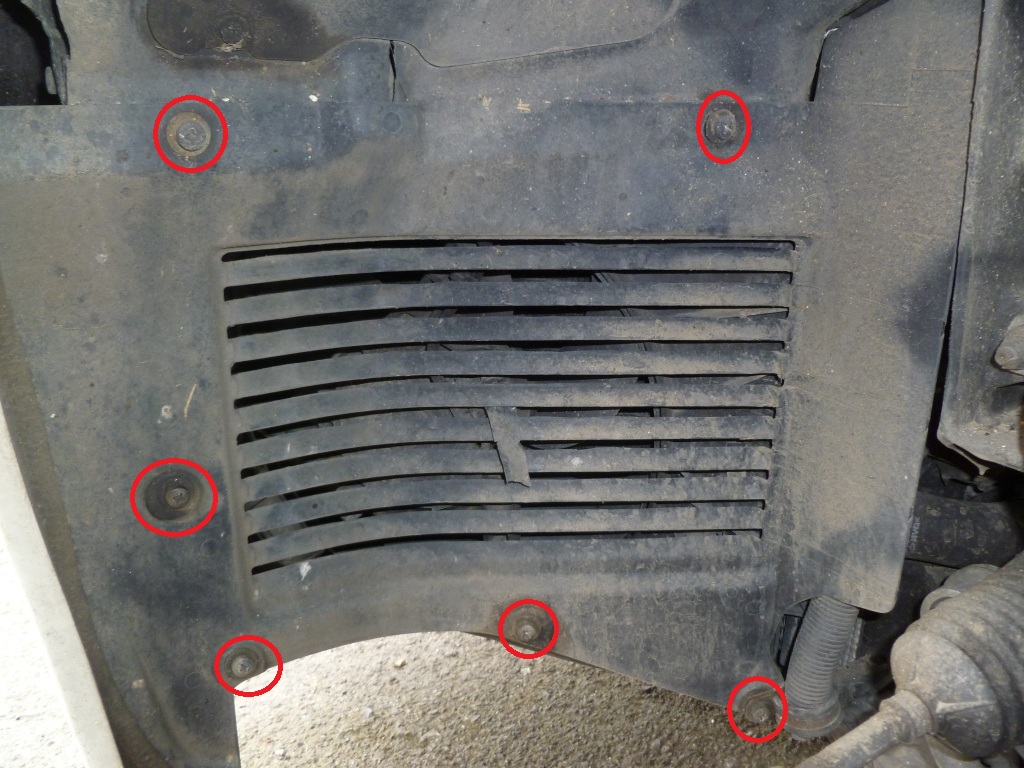
First up, remove the front wheel and take off the front wheel liner by undoing the 5 screws:
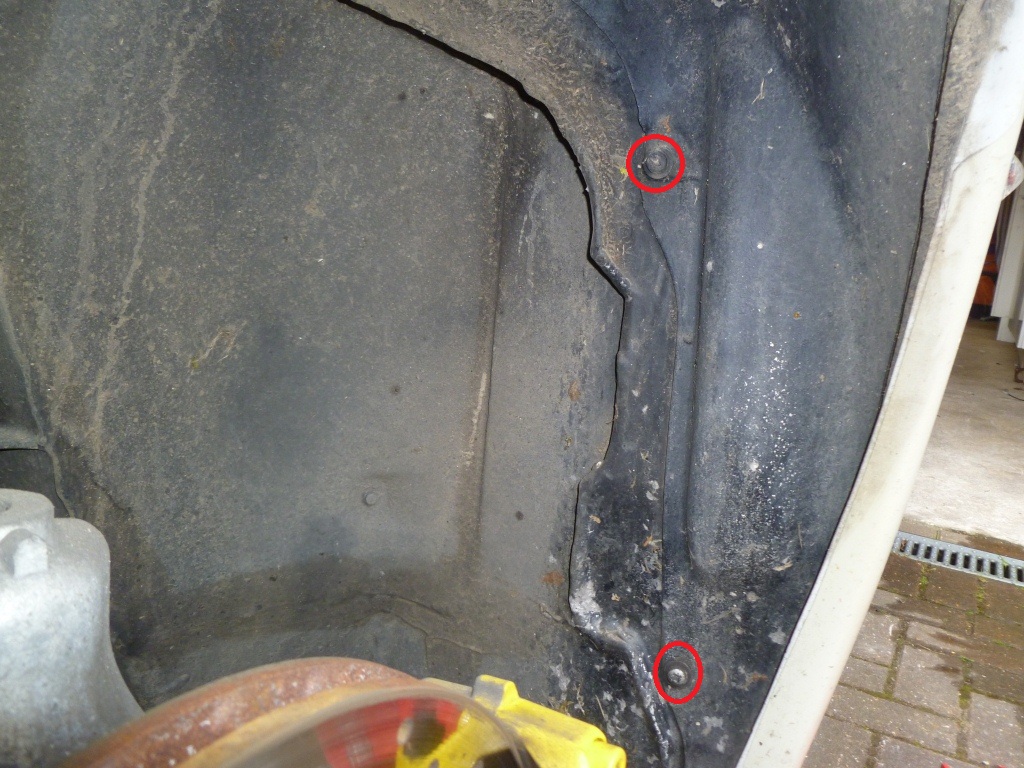
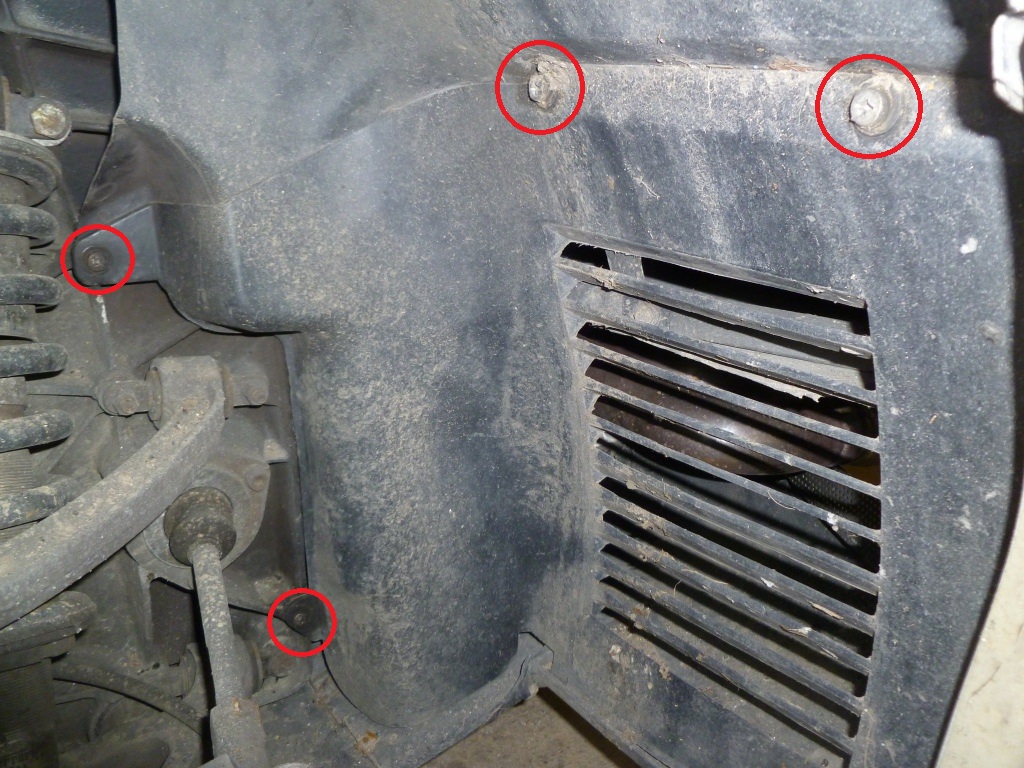
Next remove the upper/rear liner, there are two screws up top…
…and two screws to the rear:
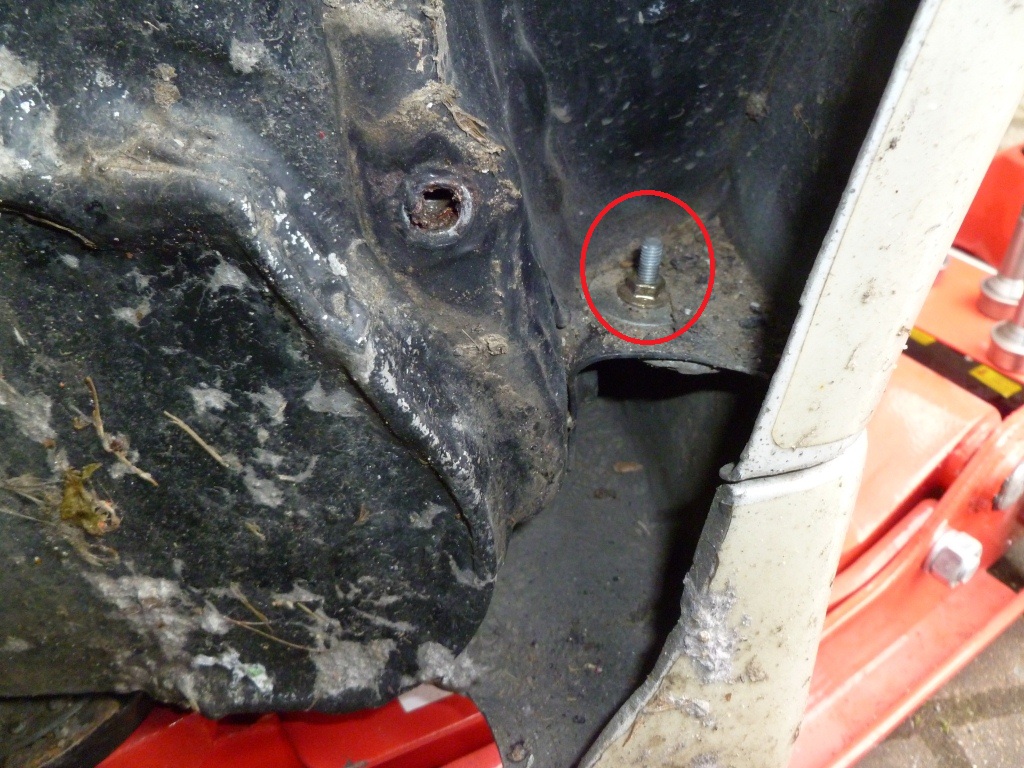
Undo the nut holding the front of the side skirt to the wing:
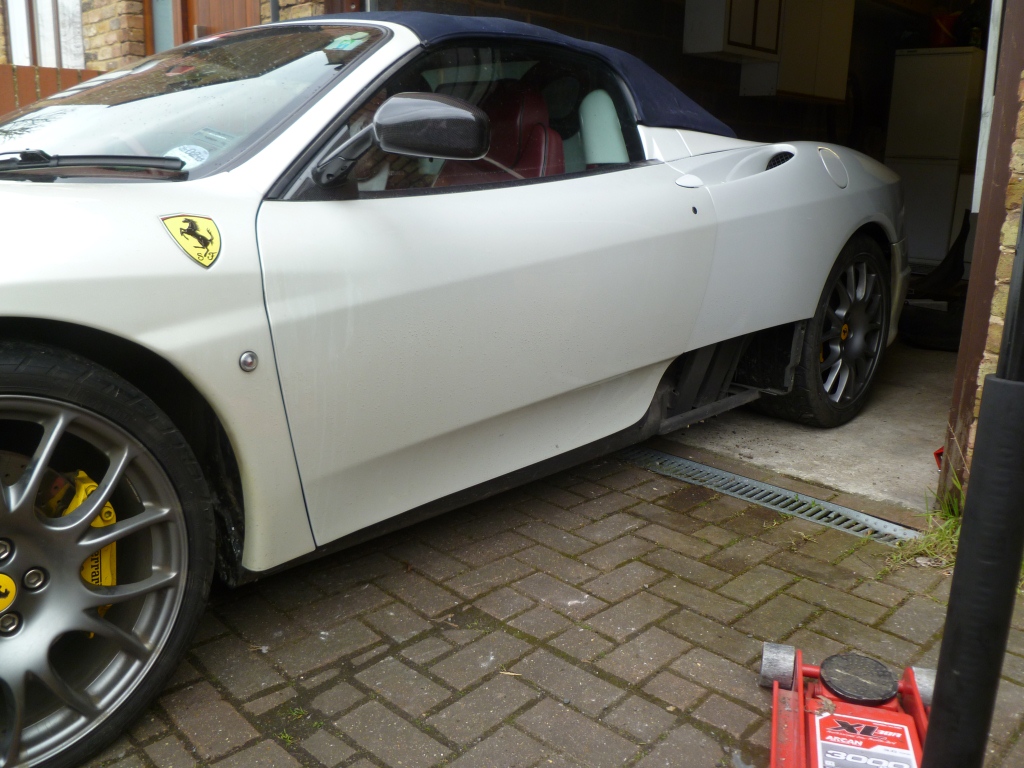
You can now refit the front wheel if you wish.
Next remove the rear wheel and take off the rear liner:
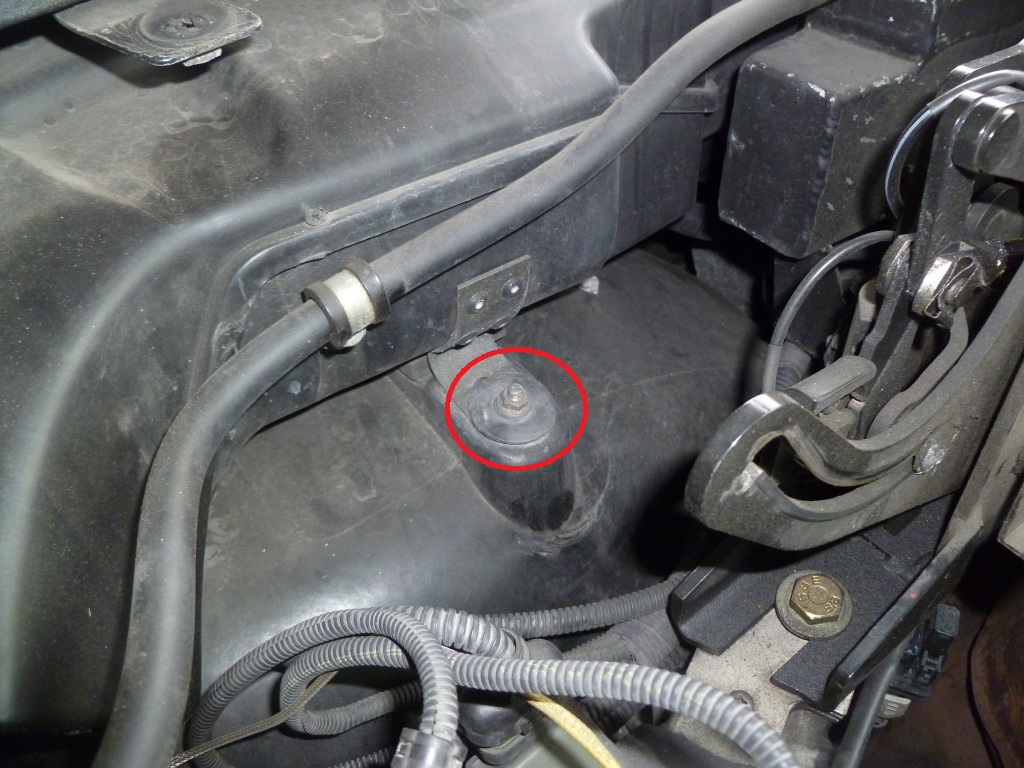
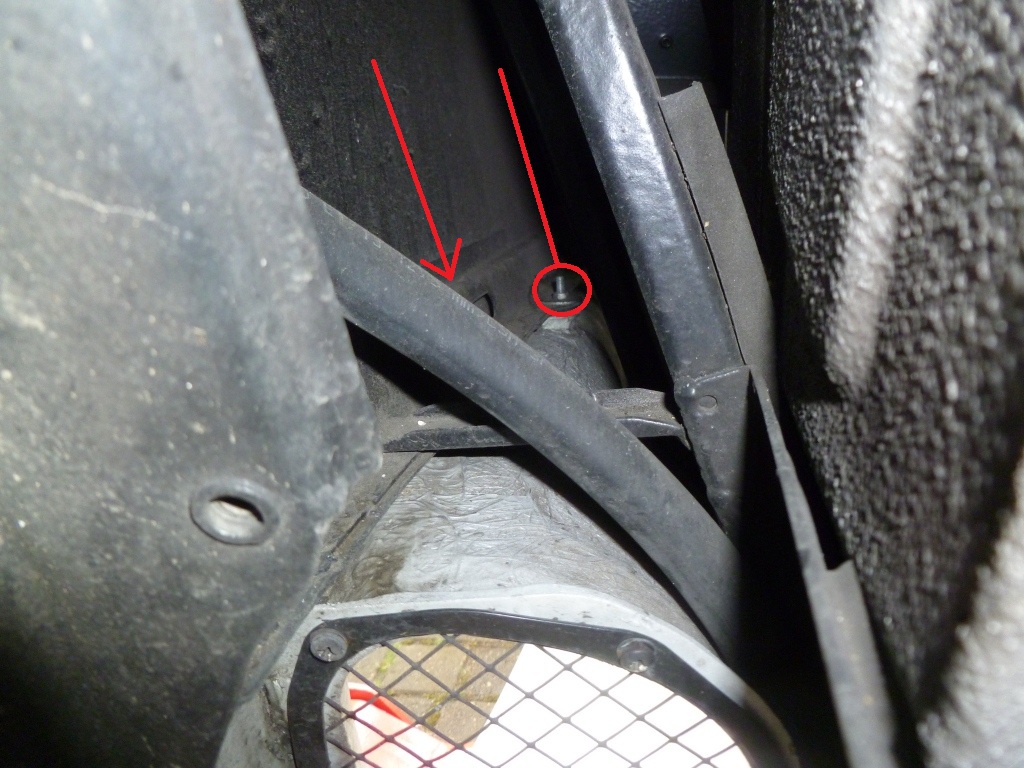
Now the upper/front liner needs to be removed. There is a bolt that is accessed from the engine bay (behind the trim panel):
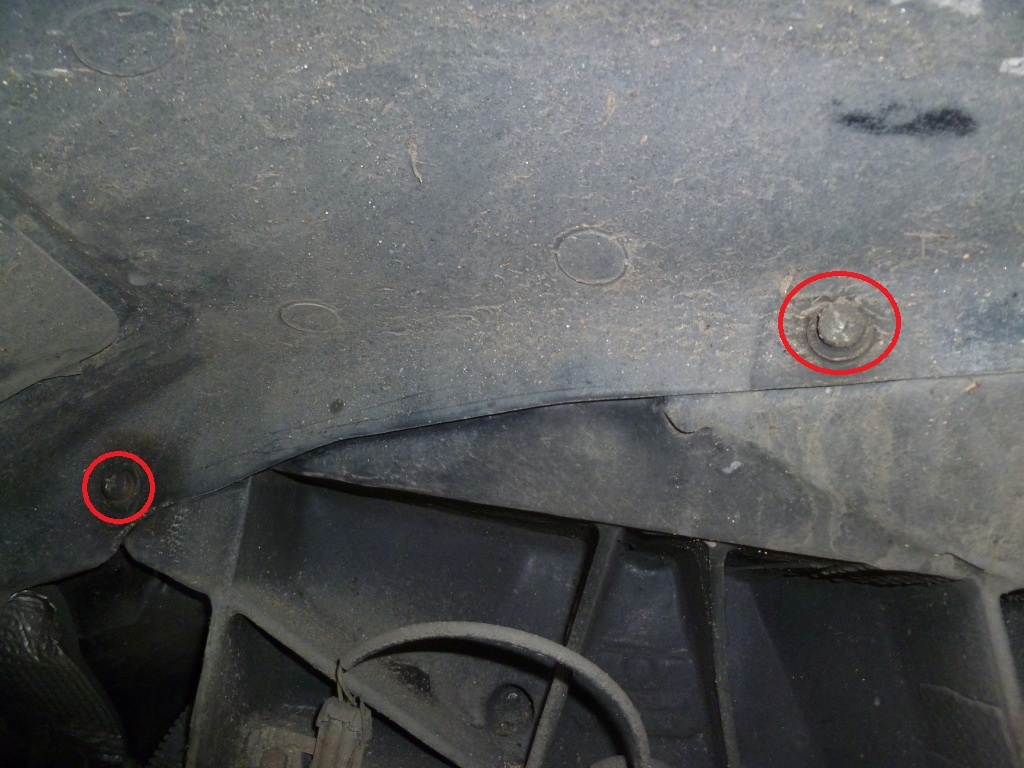
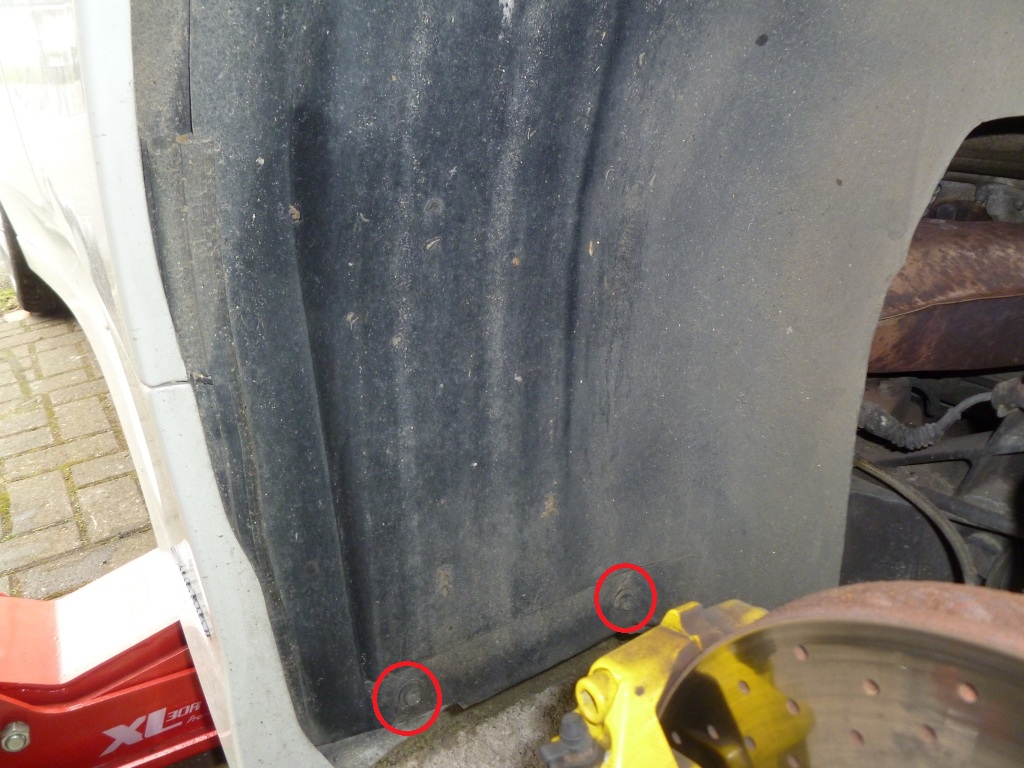
There are two screws at the bottom:
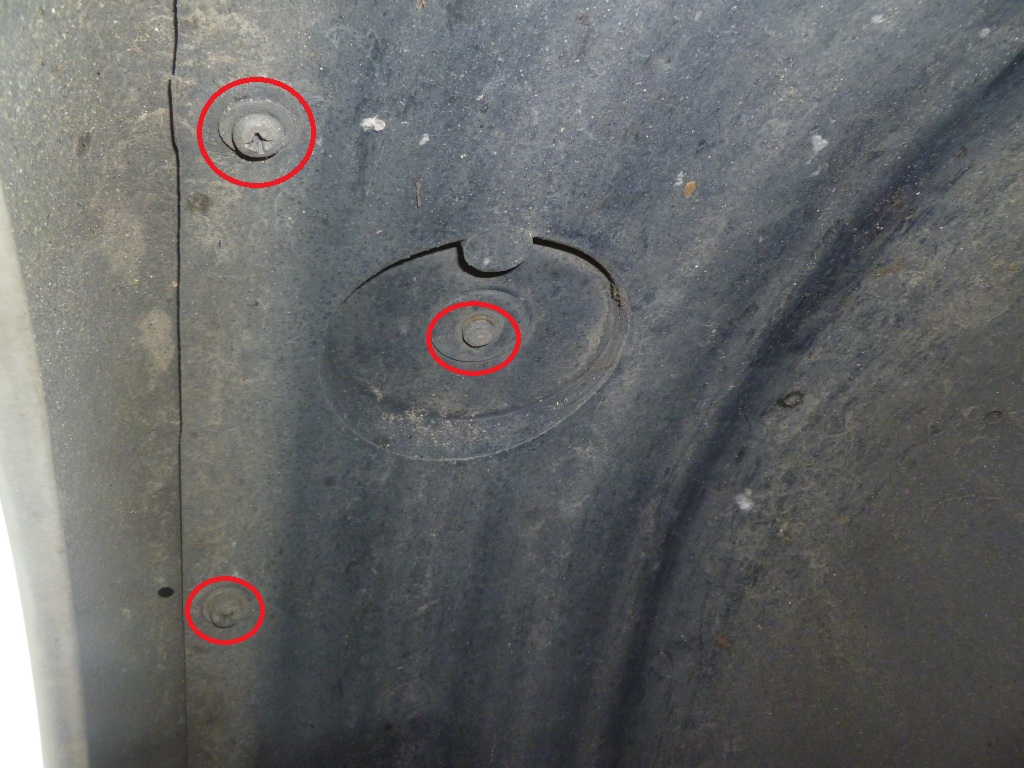
and two more up top as well as a bolt:
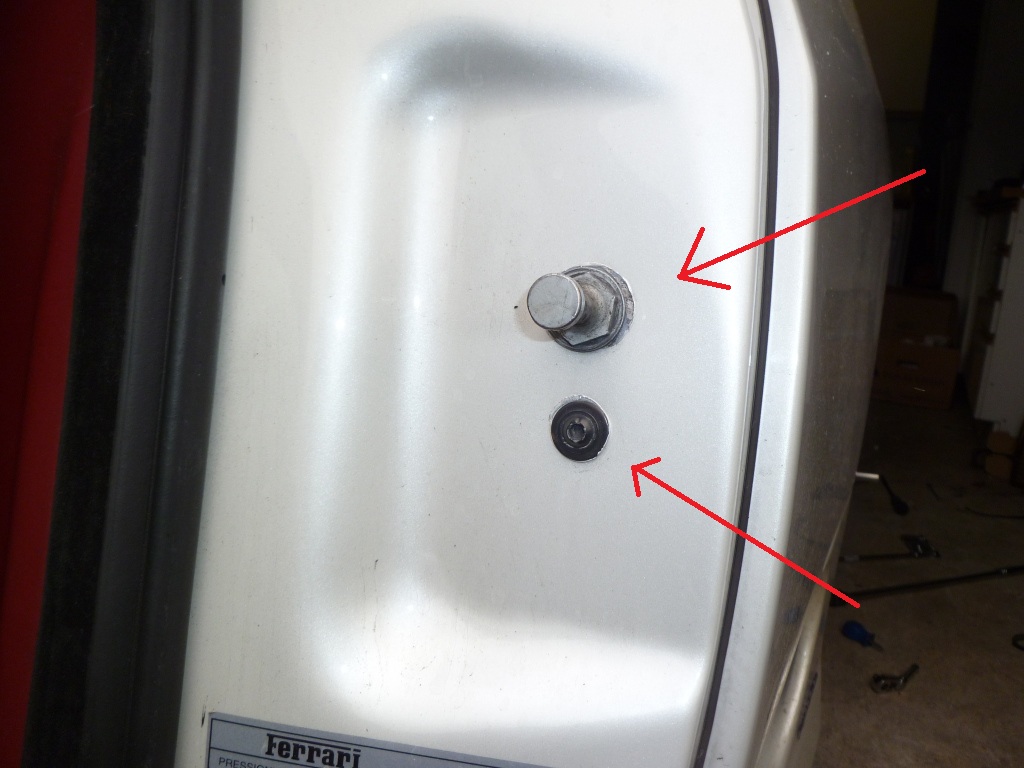
Next remove the door striker (19mm deep socket required) and hex bolt:
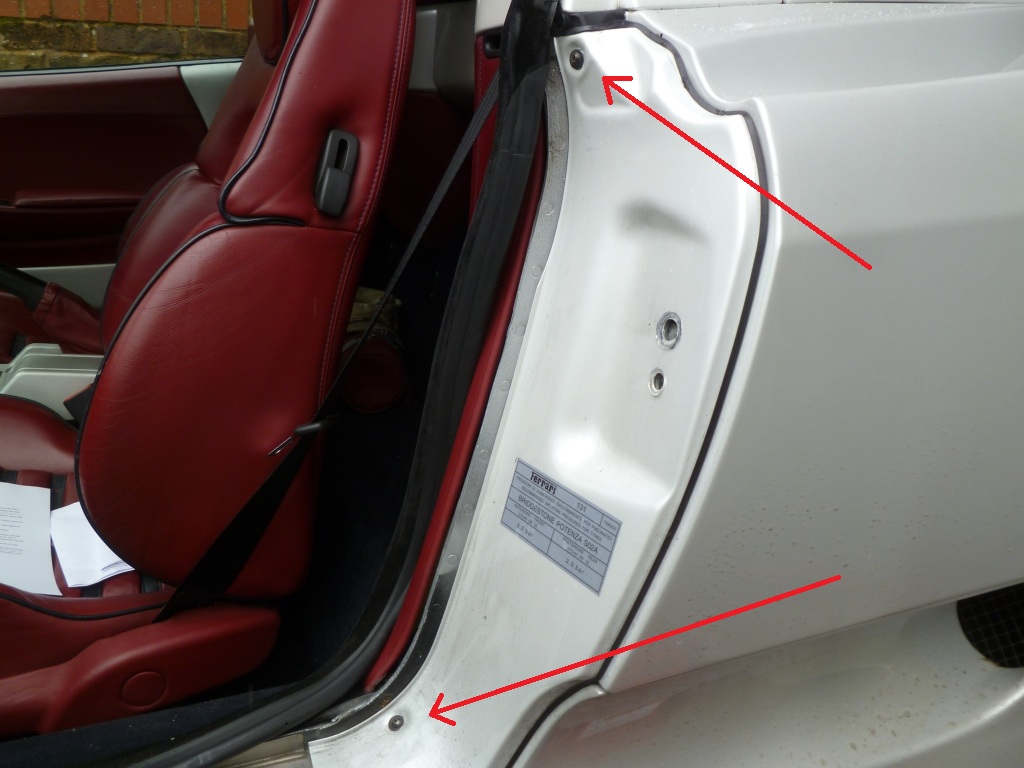
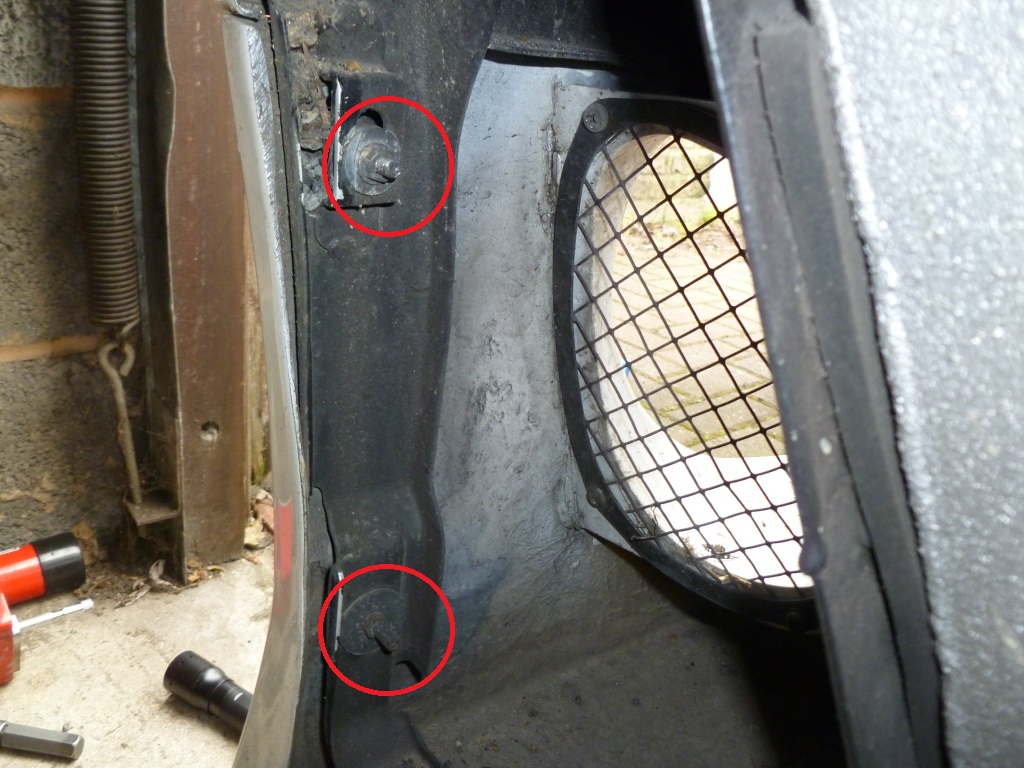
Pull back the door seal and remove the two hex bolts shown:
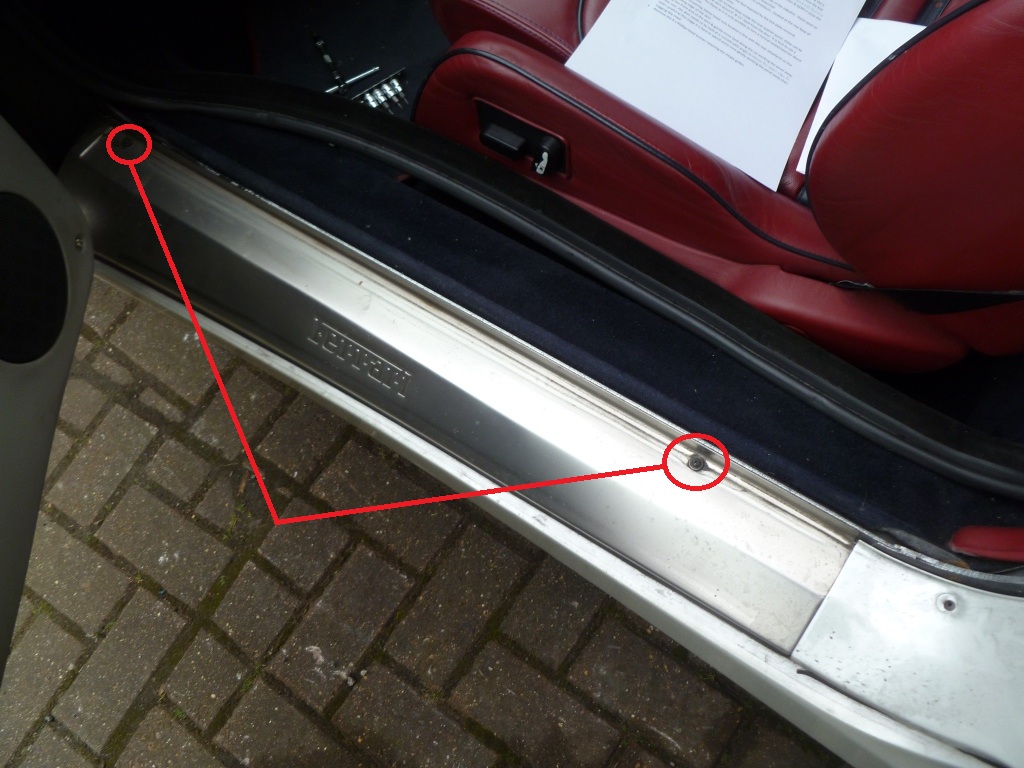
And the two bolts holding the kick plate in place:
Now the kick plate and B post cover can be removed.
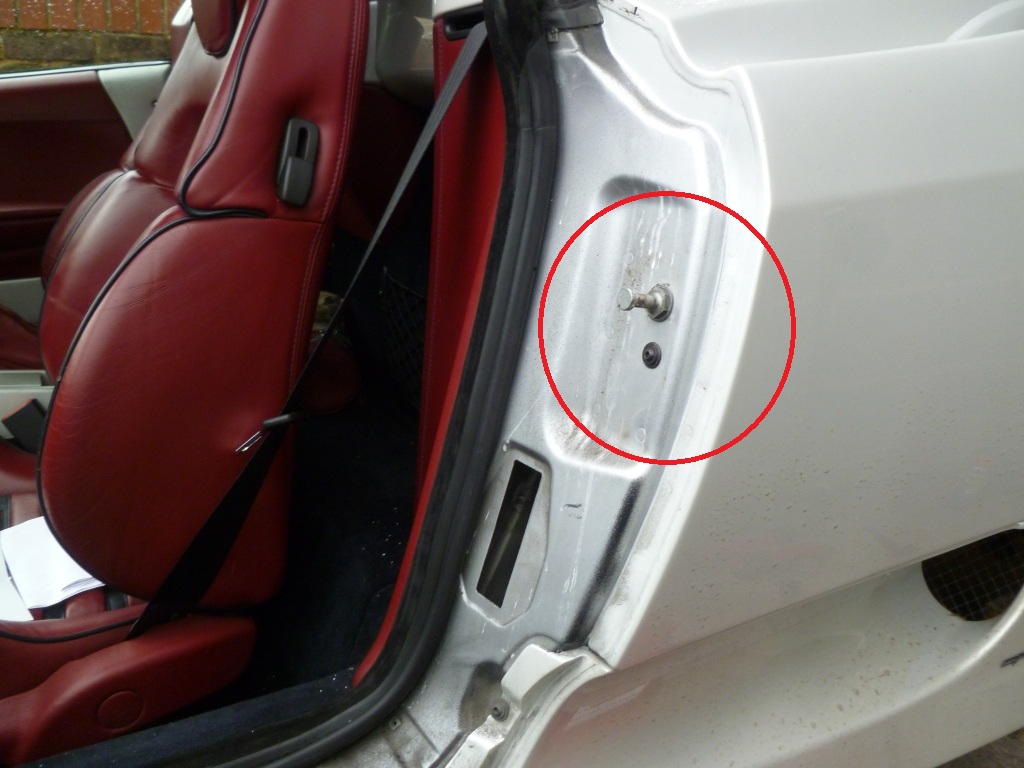
If you wish to close the door then refit the seal, striker and hex bolt:
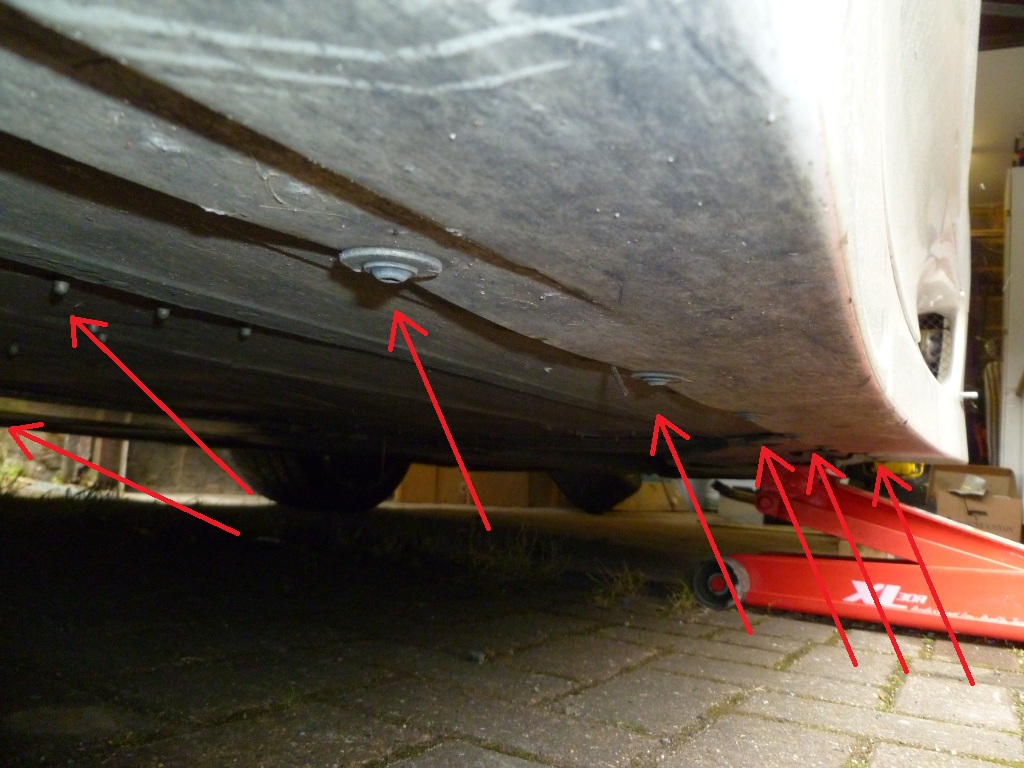
Now undo the multitude of hex bolts holding the bottom of the skirt to the chassis:
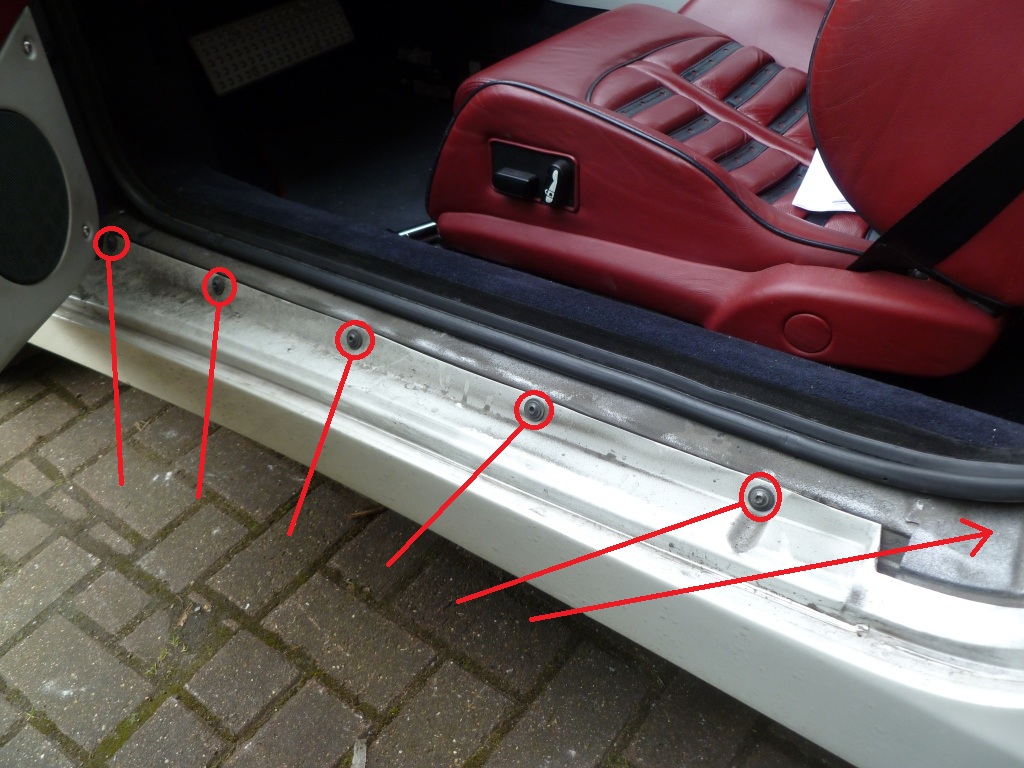
Now remove the bolts exposed by the kick plate:
From inside the rear wheel well, reach into the end of the skirt and undo the two nuts holding the top of the skirt to the chassis (a ratchet spanner works well here):
The final two bolts to be removed are at the rear of the skirt:
Now the skirt can be prised away from the body. I started at the front and worked backwards.
The rear wheel can be re-fitted if needed:
Other posts in this category: Bodywork
If you enjoyed this post why not subscribe to this blog for further updates? Simply enter your email address in the box at the bottom of this page.

1. My 360 battery went dead, probably because I left the front luggage compartment lid slightly open. I removed it from the car. Is it ok to leave battery discharged until I plan to use the car…possibly in about 3 weeks. At that time I will fully charge it and place it back in the car.
2. What do you recommend for paint swirls and light scratches? I already tried using “clay” on the car. Any good waxes you know of?
3. have you ever dyed the leather in your car? I wonder if it is very difficult.
Any advice on the above?
Thanks! ANTHONY C. ALVAREZ
Hi Anthony,
1) I would prefer to charge the battery and put it in the car. Otherwise the alarm and tracker back up batteries will run down.
It is worth investigating why your battery ran down as the luggage compartment light should switch off even if the hood is left open.
2) I use 3M Perfect-it polish and Dodo Juice wax.
3) I have never dyed leather before – I think I’d leave something like that to an expert!
Kind regards,
Aldous.
I re-fitted the skirt the other day and have a couple of tips to share. Firstly, fitting the skirt was best done from the rear (I sat right up against the leading edge of the rear wheel arch). The skirt has to be tilted into position to get the two upper bolts into their holes. Then the skirt can be moved upright to get the rear two bolts in place. Finally I went to the front and got the front bolt in place.
If you’re doing this on your own then some tape on the bottom of the front wing is advisable.
When re-fitting the trim inside the door shut on the B post it was helpful to tape the rubber gasket in place as shown below. I also taped up the area where the striker and hex bolt go in order to protect the paint. Once I was happy with the position of them I undid one at a time to remove the tape.
When doing up the upper bolts that are right inside the car I used a universal joint on the socket with a couple of long extension bars – it worked a treat to tighten the nuts up….
Hi
Do you know whether the process for the F430 is the same or similar?
Thanks,
Mike
It’s almost the same – thanks.
Many thanks – I’ll give it a go. I have a bit of corrosion inside the OSF wing which is creeping towards the skirt – need to get it off to repair properly before it gets any worse.
Hi Aldous
Is it possible to remove the S/S kick plate by removing the two screws that you have shown, without disturbing any other screws etc.
No – the kick plate is under the body coloured trim that the door striker is attached to