The Ferrari 360 and F430 (as well as other tipos of the era) were all shipped from the factory with infotainment system head units manufactured by Becker. These head units were manufactured especially for Ferrari but, apart from physical and electronic Ferrari branding, are essentially identical to their commercially-available counterparts of their time. The exact model fitted in a given car depends on the year of manufacture, region, and on what optional extras were originally specified by the original purchaser (e.g. satnav, hifi upgrade, multi-CD changer), but the basic installation/removal procedure is the same and they should all share the same basic connections. In this article we will look at the head unit fitted to a 2003 UK Ferrari 360 with OEM satnav and hifi upgrade, but without the multi-CD changer.
In order to remove the head unit from the car you will need a set of removal keys like the ones pictured below:
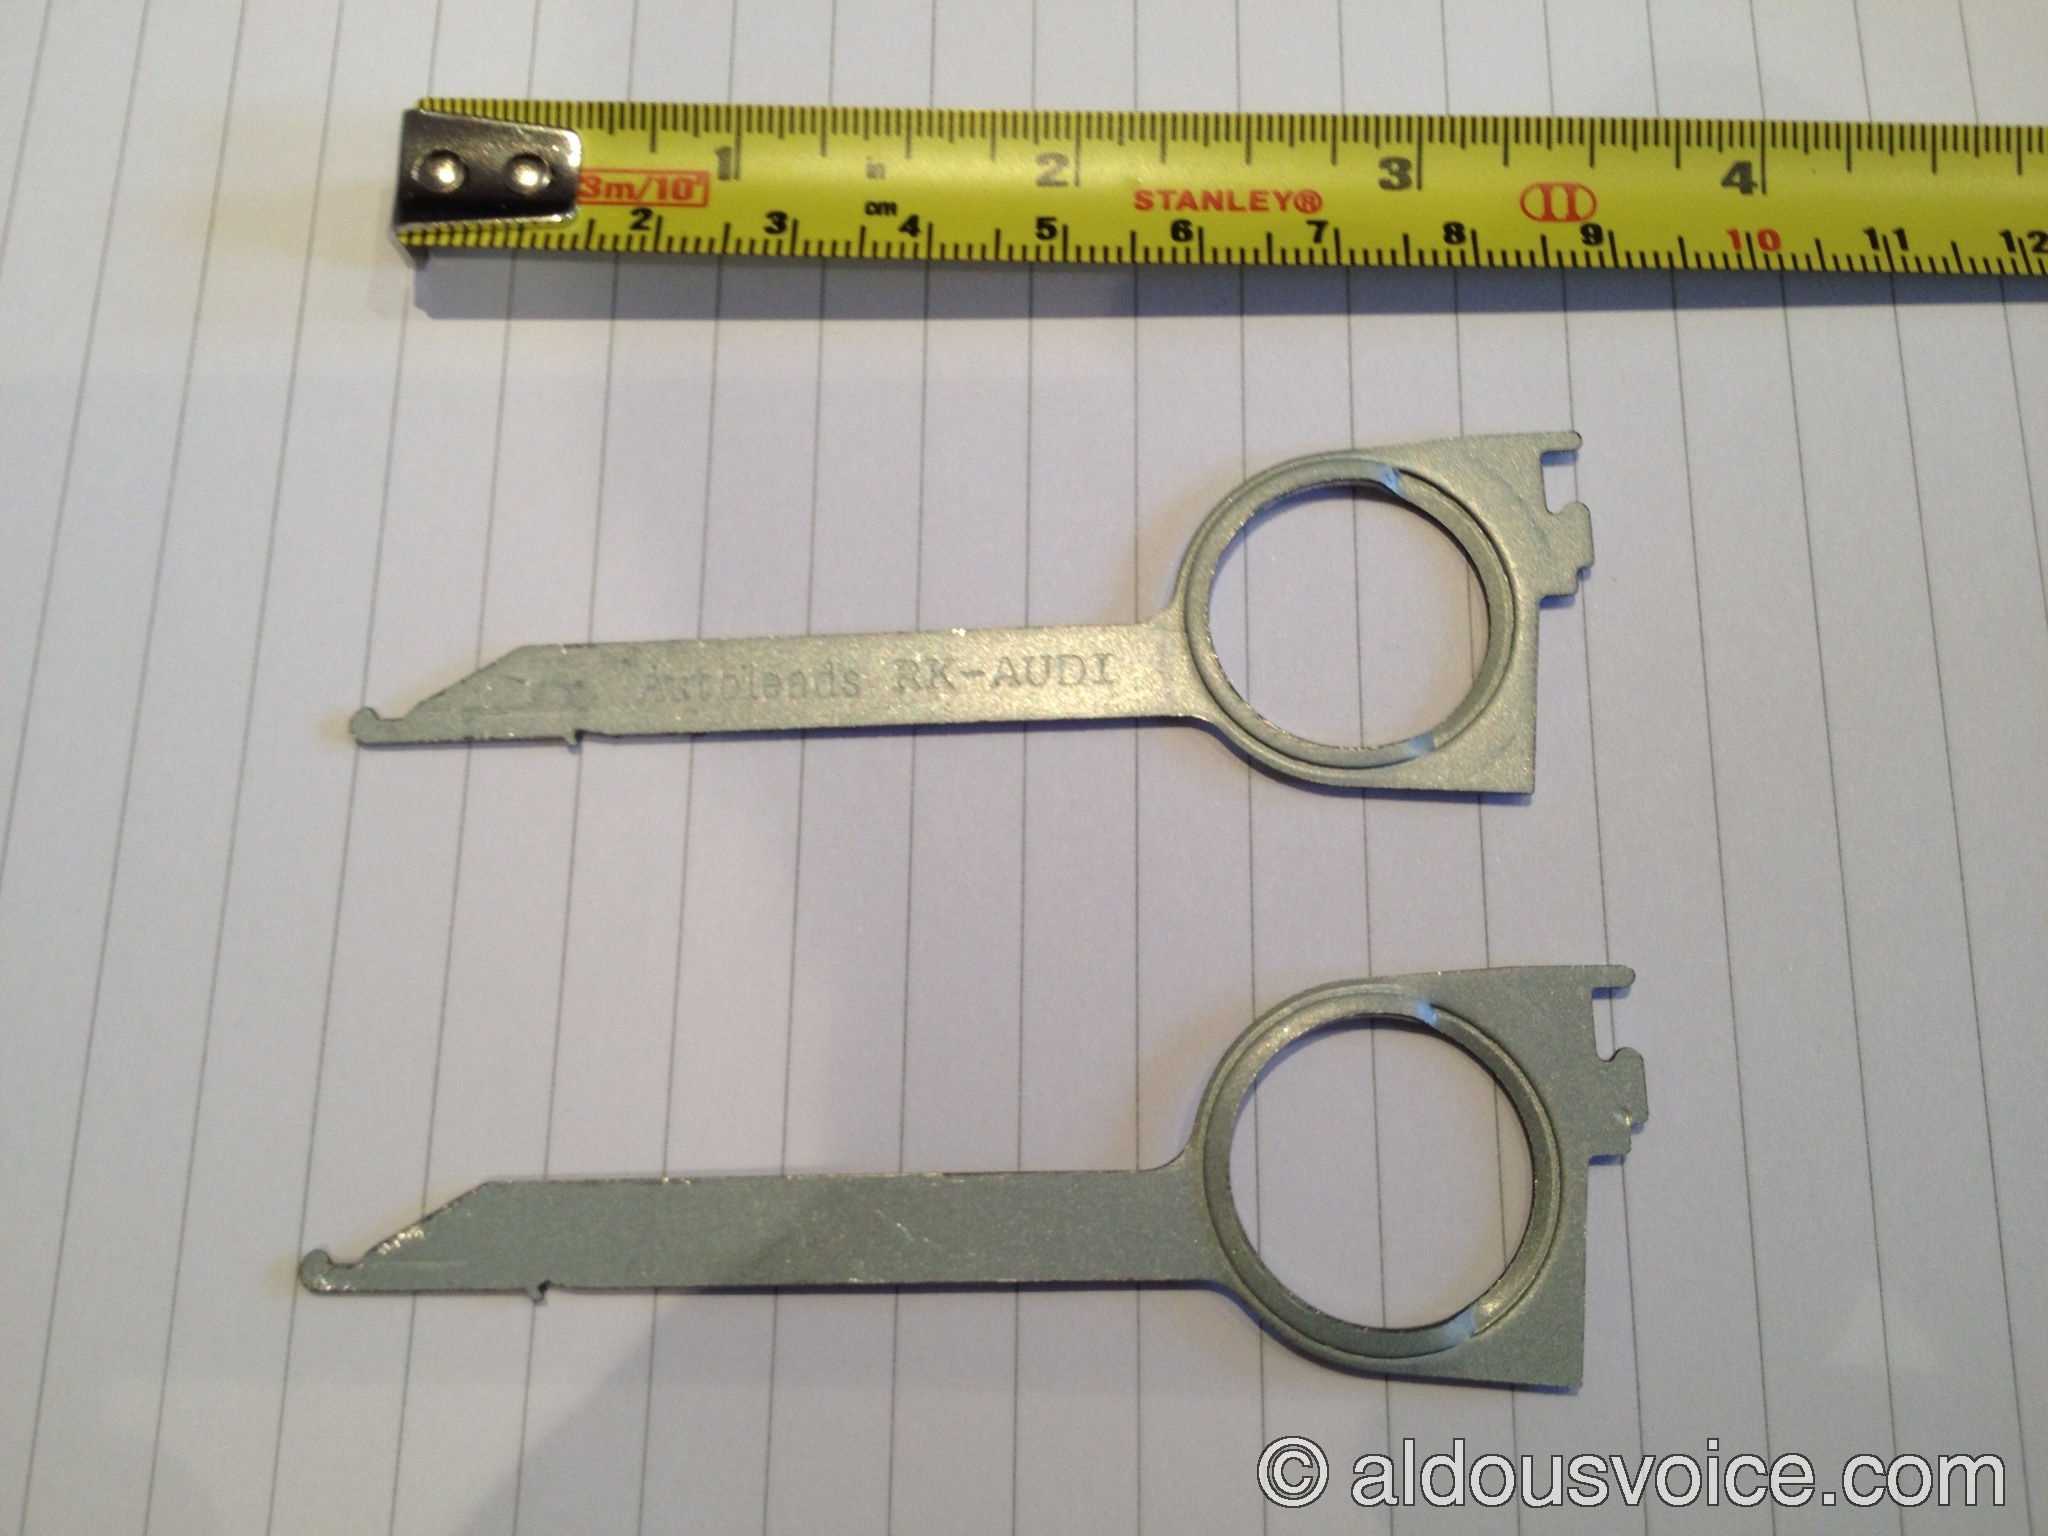
These were originally supplied with the car but are easy to replace if they are missing – searching the Internet for CT22BE01 should yield plenty of inexpensive replacement options.
Before attempting to remove the head unit it is imperative that the battery cut-off switch is set to the OFF position – do not miss out this important step! Once this is done, locate the two small horizontal slits near the two bottom corners of the head unit and insert the removal keys into them, with the flat side of the blade facing outwards. You only need to insert ~3cm of the blade to engage the release mechanism. With both keys inserted like this, pull the keys outwards to operate the release and (at the same time) towards you – the head unit should slide out of its single-DIN housing. The video below shows how the release mechanism operates on a head unit already removed from the car.
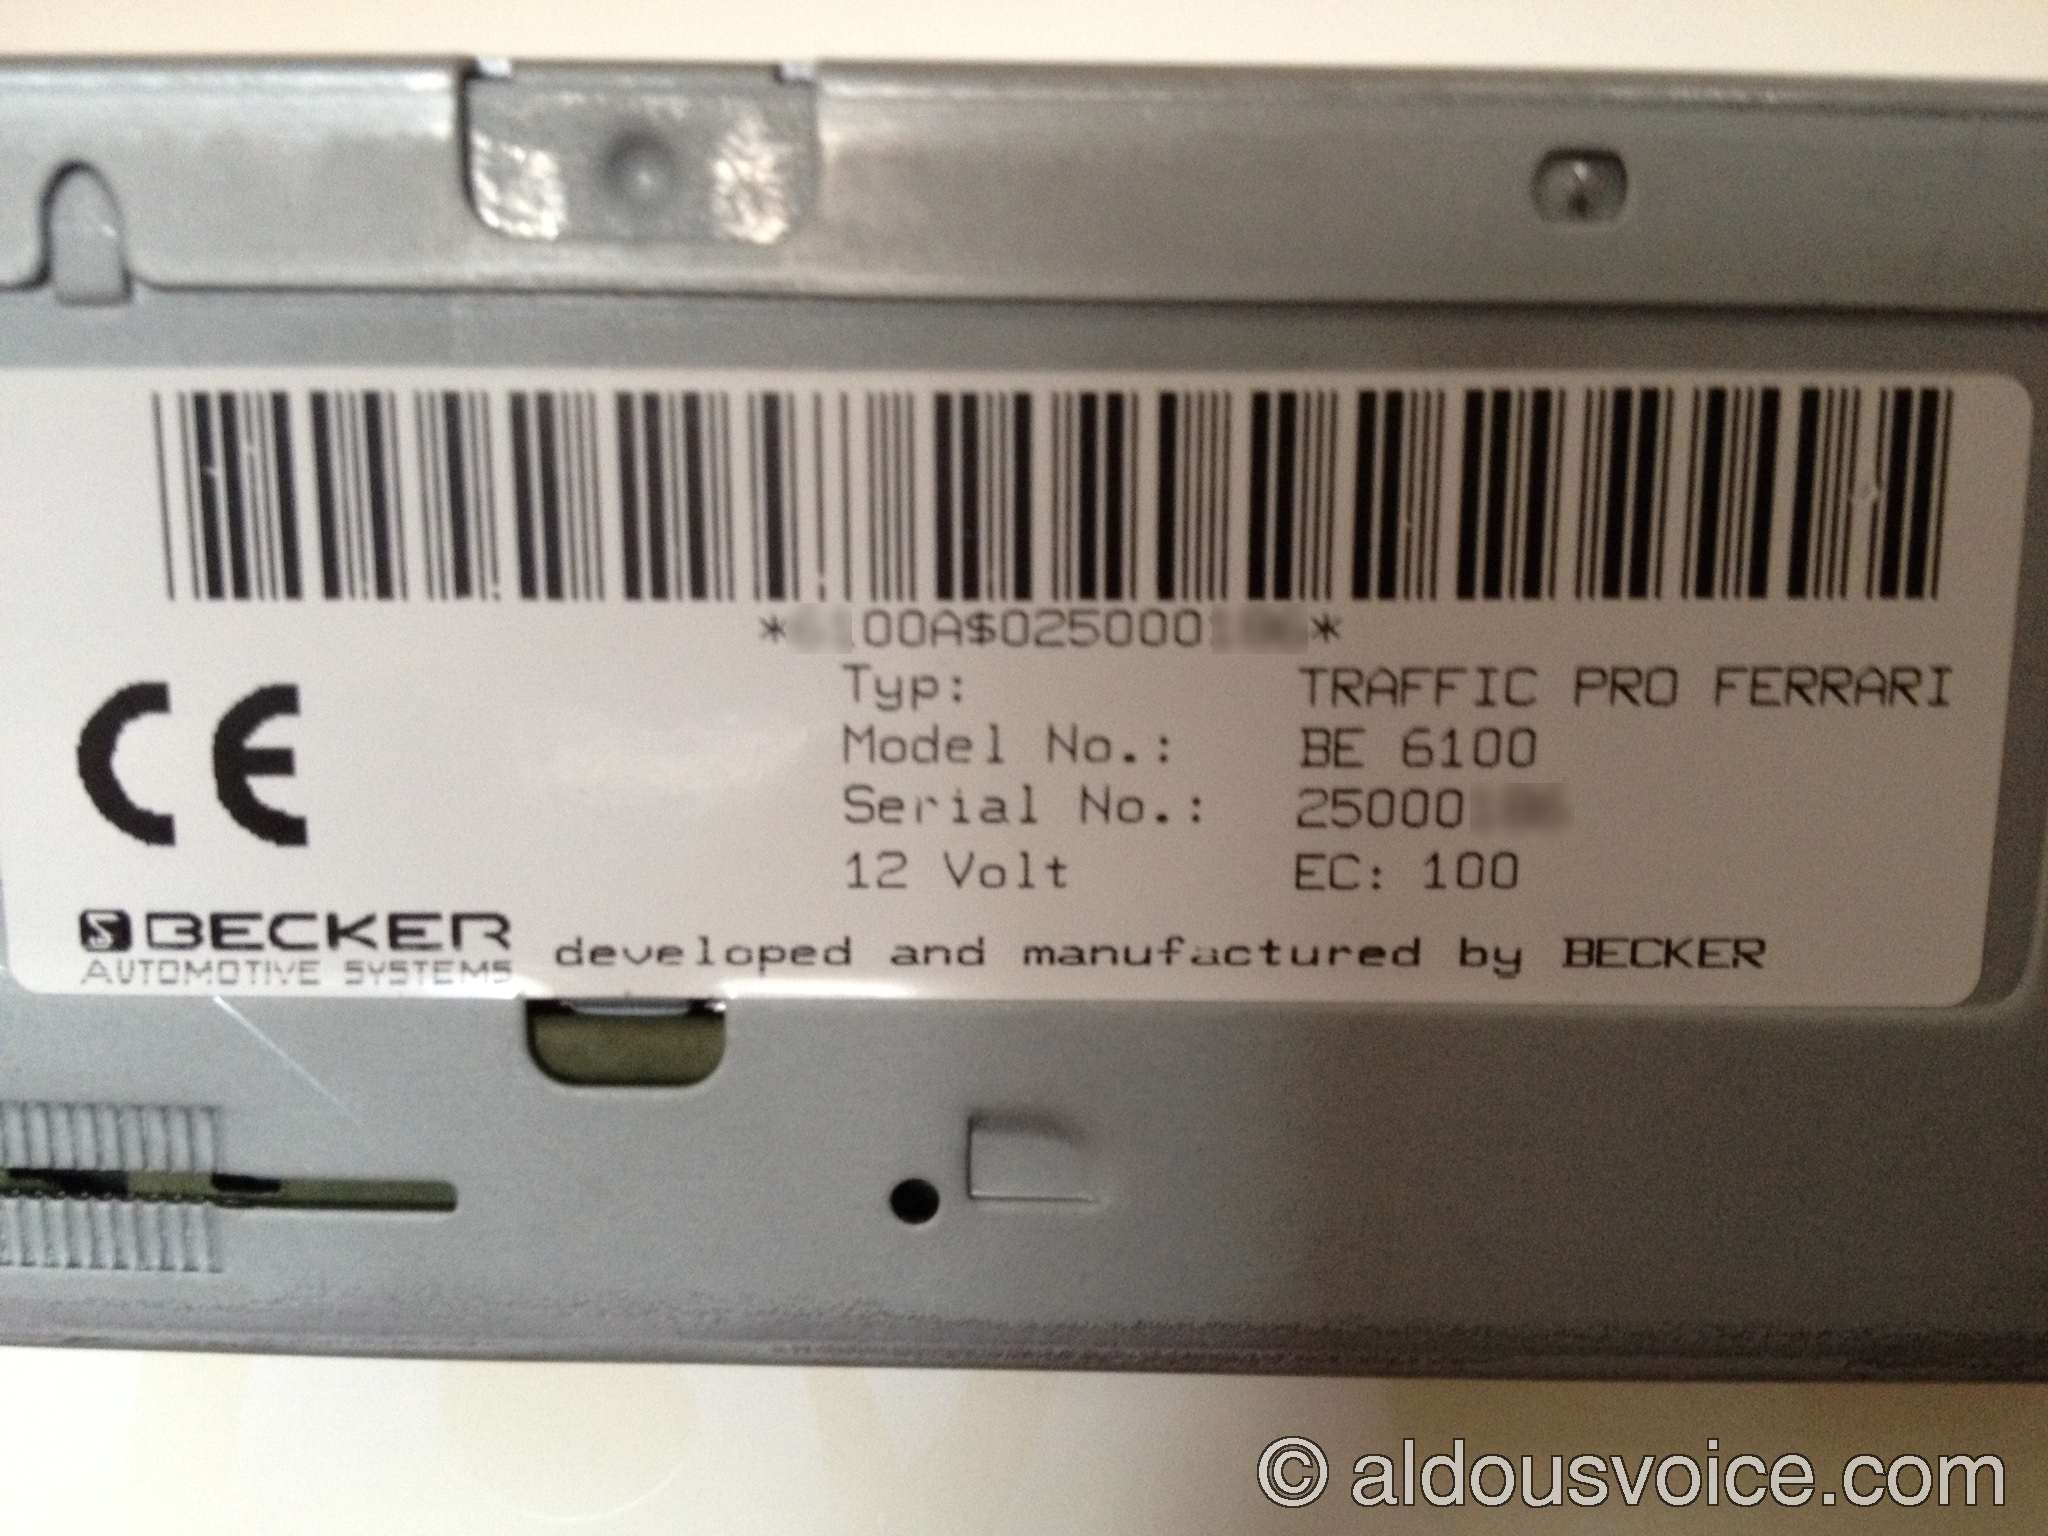
As it slides out, one of the side of the unit should have a sticker with the exact model name, as well as the serial number. In this case the unit is a “Traffic Pro Ferrari BE 6100”. The serial number (partially obscure in the photo below) is also useful if you no longer have the security code for the head unit (which was originally supplied with it, printed on a separate card) as there are companies over the Internet which can recover the security code from the serial number, for a fee.
If you want to completely remove the unit from the car you will have to disconnect the cables at the back. There will be up to five sets of connections at the back, namely
- the main power connector (“socket A”)
- the loudspeakers connector (“socket B”)
- “socket C”, which has three sub-sections for line out/CD changer control/aux in
- the radio antenna socket
- the GPS antenna socket

Cables in sockets A, B, and C will have plastic retaining clips which need to be pushed inward towards the connector itself in order to free it from the socket – they can be quite stiff.
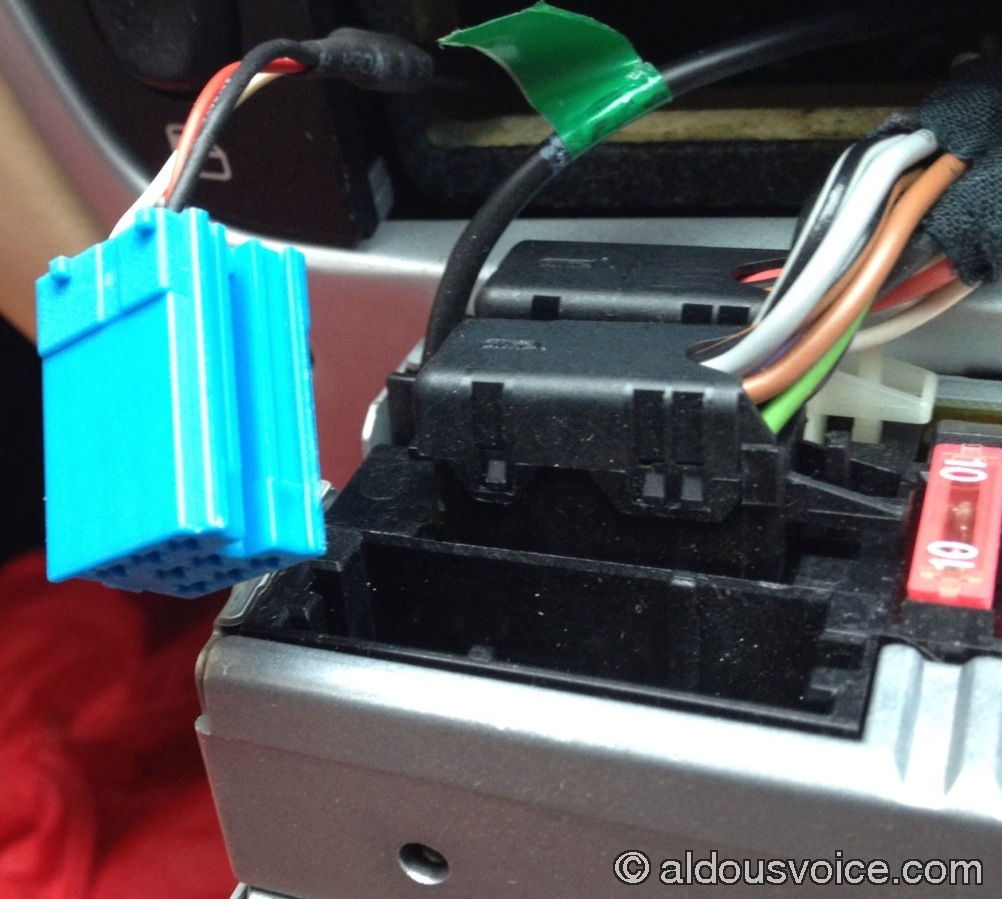
Even if the CD changer was not installed (as was the case in this car), the wiring to control it will be present, so connectors for socket C can be seen. Since there is no need for them, leave them unconnected and secure neatly out of the way.
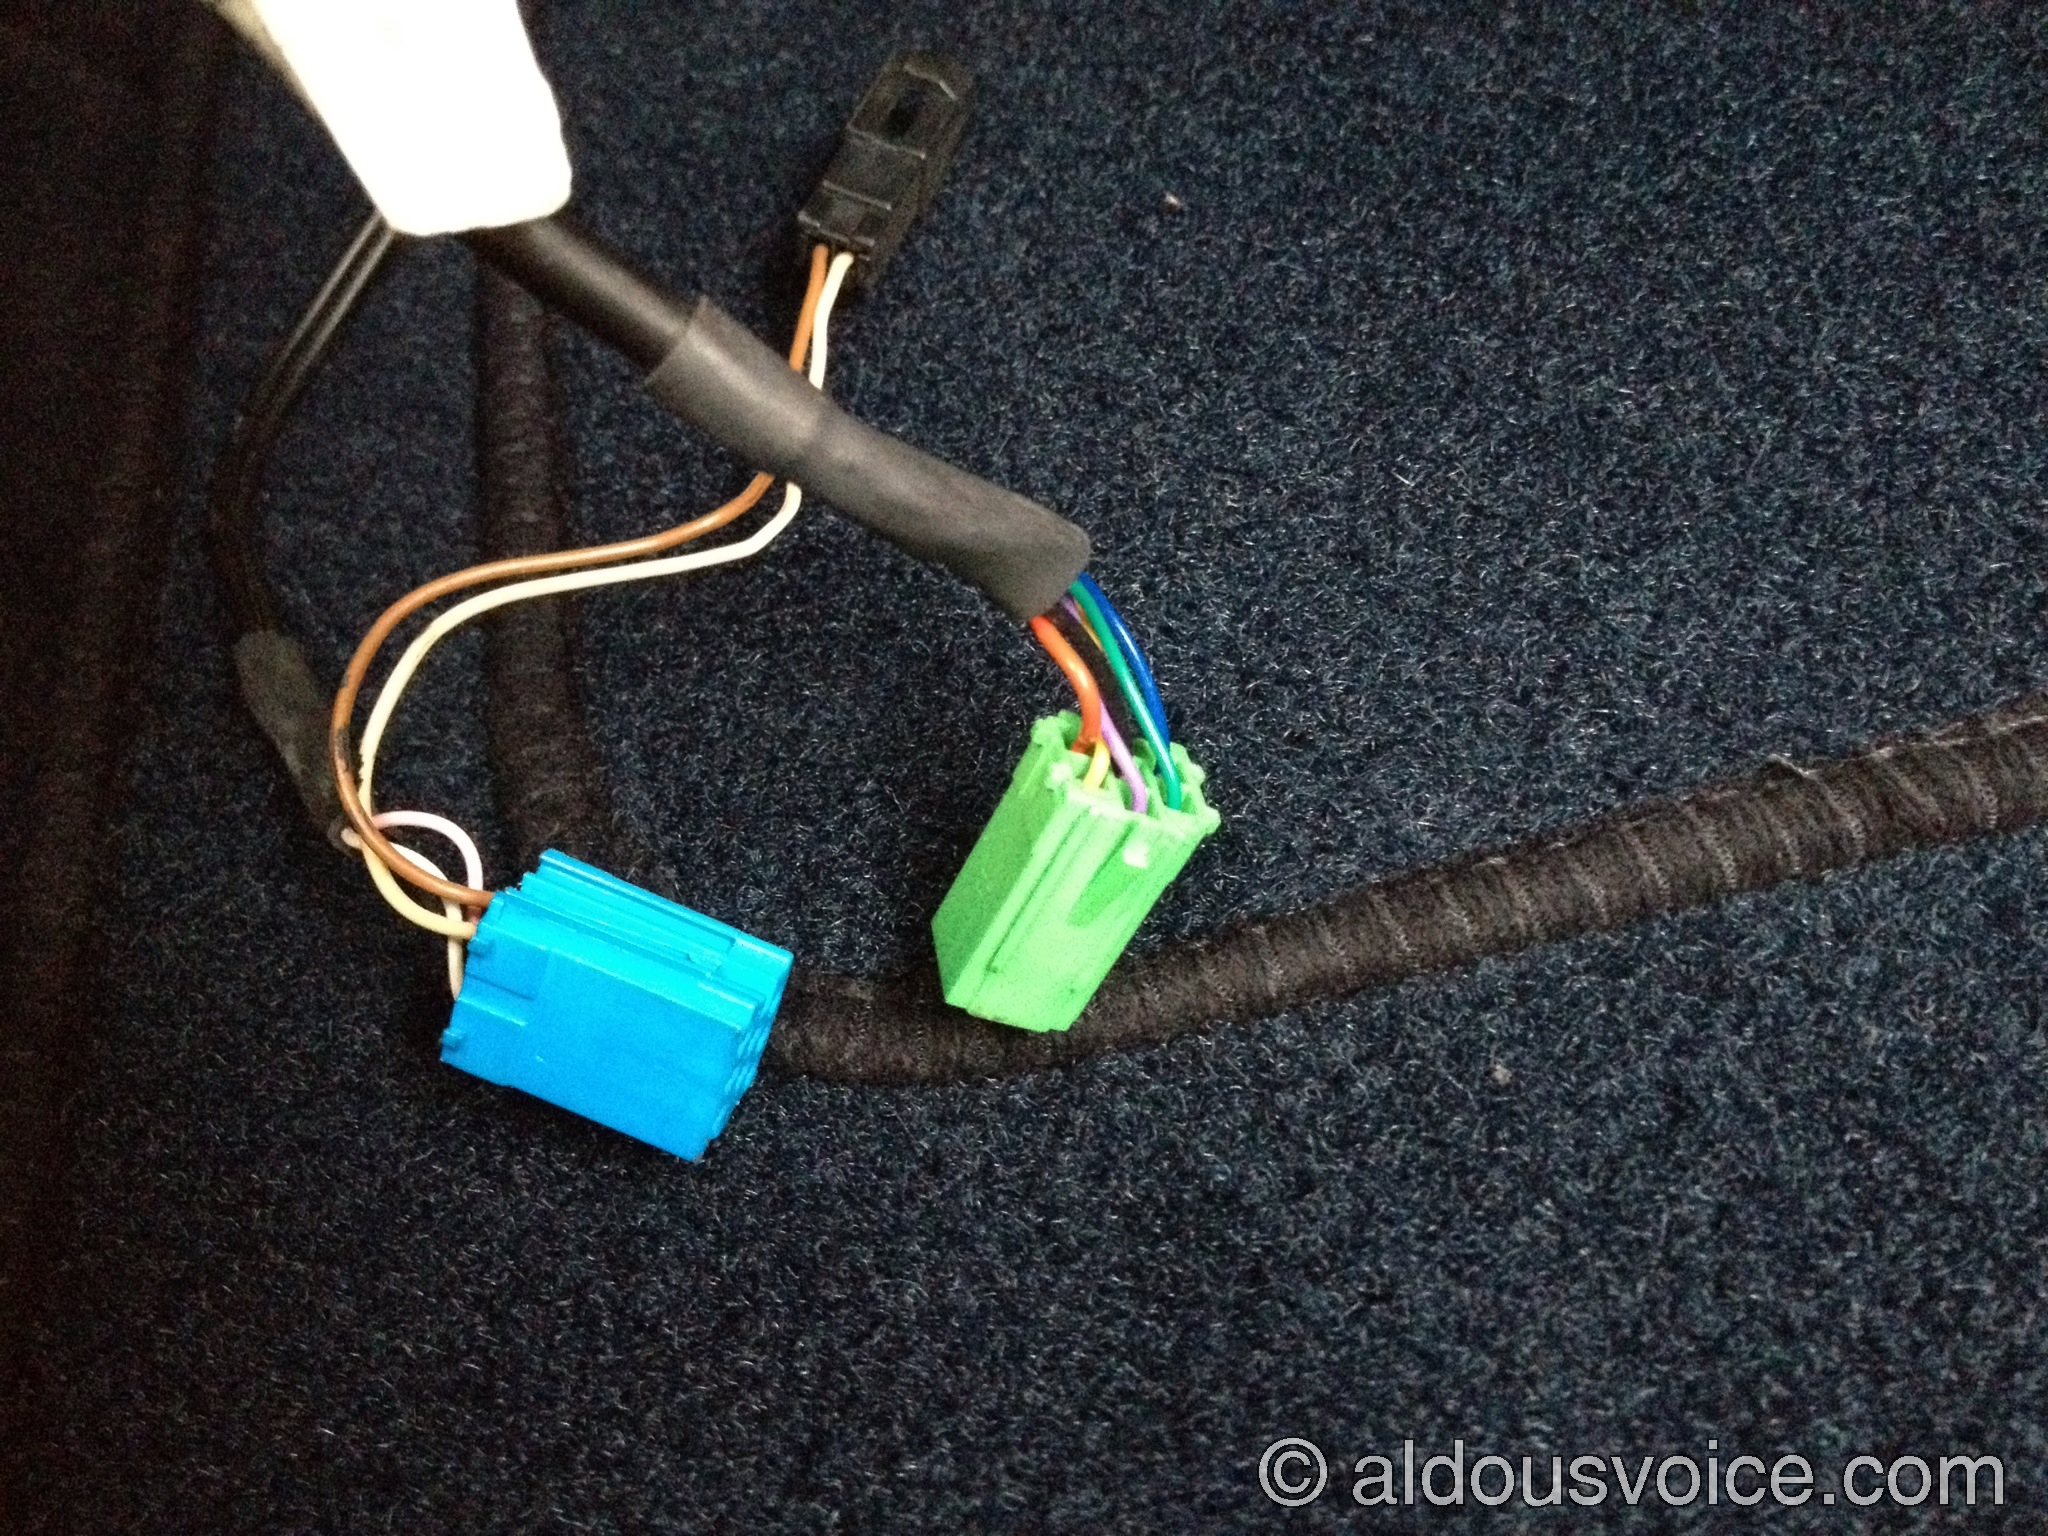
If you do not have or do not use the multi-CD changer, a worthwhile addition to this type of head units is an aux cable. This is essentially just a stereo cable which connects to socket C3 on the back of the head unit on one end and to a 3.5mm stereo jack/iPod connector on the other. This can be purchased very inexpensively (less than £10) as the connector is standard (often referred to as “mini ISO blue”) and is shared by Blaupunkt head units – just search for CT29BP02 or “Blaupunkt aux cable”.
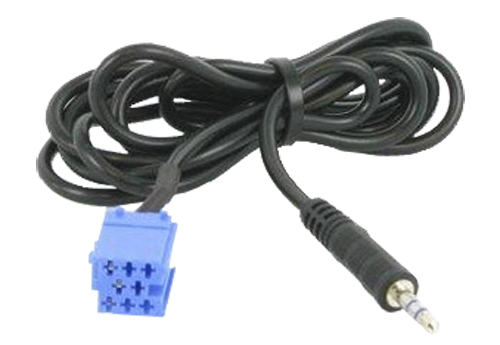
If you install this aux cable it can be routed from the back of the head unit to the passenger footwell or, with a bit more work, into the glove compartment through its courtesy light housing. Be aware that the aux cable above is relatively short at about 1m. A alternative is to assemble it yourself to your desired length – stand-alone mini ISO blue connectors are available to purchase separately.
Once the aux cable is connected, the head unit can be inserted back into its housing by sliding it backwards making sure it is kept level, as the locating rod at the back of the unit needs to slot into the corresponding hole in the frame. Before you can use the aux cable, the head unit needs to be configured to recognise it. The procedure varies slightly among Becker models but for the Traffic Pro it is as follows:
- switch on the head unit
- press and hold the “tone” (‘dP’) button for 3+ seconds to enter the settings menu
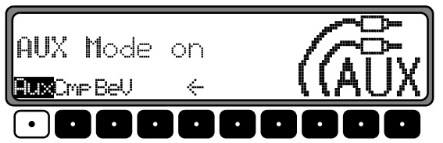
- navigate to the Aux section (you may have to scroll right using the button under ‘->’)
- press the button under Aux to select ‘Aux On’
- press the “tone” (‘dP’) button again to exit the settings menu
He is a video showing the menu process:
You can now select your Aux source by pressing the CD button.
Other posts in this category: Interior
If you enjoyed this post why not subscribe to this blog for further updates? Simply enter your email address in the box at the bottom of this page. Your details will not be shared.

Hi Aldous, any idea if this will work alongside the multi cd unit? Sort of sounds like it should but just wondering if you know. Cheers, Laurie.
Hi Laurie,
Sorry, I should have been more specific but this cable replaces the CD function. It plugs into the same pins on the headunit as the CD player does.
Cheers,
AV
Hi Aldous,
The following might come in useful for somebody.
My car is fitted with a BE 4377 stereo with CD multiplayer.
To get to the menu on this model you have to hold the TP button in and for a long time. My guess would be 30 seconds but it might have been less.
The unit then makes a LOUD sound and the display changes to show BECKER 1.
To scroll you turn the right hand knob. Eventually you get to AUX, change the value using the buttons under the up or down arrows and you are away.
I’ve only had a brief test but it seems fine.
In hindsight a headphone plug may have been a better option because then you could charge the Apple device while playing music. As it is so cheap I may go down this route at some point.
Regards,
Laurie.
Thanks for the info!
I have been wanting to install an iPod connector with my Becker 7844 Cascade but also want to use the head unit to control the iPod which these aux cables don’t allow. I find it dangerous fiddling with an iPod whilst driving! I came across a Becker remote kit v4 – a plug and play to the cd socket but with a central box midway down the wire.
The unit will allow control of an iPod with a 30pin dock connector, but you can’t connect the later thunderbolt ( iPhone 5 & 6) connector items. Also by using the dock connector the unit uses a digital output, it seems none of the cheap connectors have that facility.
The cost is significant – £130 vs £15 for a cable. The difference is due to two main reason – Beckers quality and name along with the fee it has to pay to Apple to licence the ipod compatible features. It does work well and the head unit displays all the info and allow me to select albums, playlists. artists, songs etc
All in all a more expensive option – fitting is virtually identical, but much greater functionality . Whether it’s worth it is up to the indidual I guess! I just thought I would make people aware of this option
Thanks for the info – much appreciated.
Thanks for publishing this. I purchased the mini ISO blue cable and connected it. Works wonderfully. Much better than the FM transmitter gadget I was using before this as I no longer need to worry about interference when in big cities.
One thing to be aware of is that the radio displays a picture of four wires disconnected when I select CD. At first I removed the full connector for “C” and replaced with just the mini blue, then I broke apart the original 3-part connector and inserted my blue in place of the original, but it still displays that icon.
On mine the menu was different than the others here. I don’t have dP button, but I press and hold TP button for a few seconds to get the menu. I tap AUX twice and de-selected CD changer, then selected Ext. audio source. Then press TP to exit the menu.
Just a quick note, when re-installing the head unit put a dab of washing up liquid (get a dot of it on your finger) and smear it around the rubber bung sticking out of the stereo. It will make it alot easier to re-fit, otherwise you may find you have to push quite hard to get it to go in.
I spent too many years taking stereos in and out.
Another thing is, they are not technically the right keys (even though they’re supplied with the cars) the proper keys lock in and can only be released when the stereo is out. Be very careful with those as it’s quite common to bend the side clips outwards which makes removal very difficult, you can however on a F430 get your hand up the side and push the clips in.
My F430 only has one slot for the key to be pushed in to release the stereo. What happens on the other side of the unit to release it.
You likely have a Becker Cascade Pro 7907. There is a panel on the left that needs to be removed to reveal the slot. The panel is removed by sliding the Ferrari badge.
Thanks for that,, Ive now replaced the mini iso blue socket with a aux one , but how do I turn on the aux on this particular unit ? I have the Becker BE6112 which is similar to the unit that you have showing above. I have plugged everything back in but the ipod doesnt seem to be recognised as I dont know how to turn the aux on.
Thanks
Eddie
Sorry I don’t know.
Hi Aldous
I have now managed to get the aux cable to be recognised by the above stereo unit. You press the button above the left handside control button to get into the main menu and use the right handside control button to scroll to the desired settings, in my case aux output
press Ok and than it is set. Than you go to the Media button to change it to the aux position. Thanks for the help in your post. It has given me confidence to work on the car
Eddie
For information, http://www.discountcarstereo.com/pdf/_bkr.pdf describes the process for enabling aux mode on a number of Becker head units. I recently used this document, together with the above instructions, to install a CT29BP02 cable on a Becker Mexico Pro Ferrari (model number BE6104). I found that after enabling the aux function it was necessary to turn the unit off and on again before aux mode could be accessed.